AI Automations
Receipt Automation
Receipt automation lets you send receipts to Topkey — by email or direct upload — and have them automatically matched to the correct bank or card transaction. This eliminates manual data entry and keeps your transaction records complete without extra effort.
How Receipt Automation Works
When Topkey receives a receipt, it uses AI to extract key details: the merchant name, transaction amount, date, and card number (if shown). It then searches your transaction history for a match. If a matching transaction is found, the receipt is attached automatically. If no match is found, the receipt is stored in your Receipts Inbox so you can match it manually.
Topkey extracts details from:
- The merchant name
- The total amount
- The transaction date
- The last four digits of the card used (when visible on the receipt)
Sending Receipts to Topkey
Option 1: Email Forwarding
You can forward any receipt email directly to your Topkey receipt inbox address. Topkey processes the email and begins extraction automatically.
To find your forwarding address:
- Go to Settings in the left navigation.
- Under Cards, select Receipts Inbox.
- Copy the address shown under Receipts Email using the Copy button.
- Forward receipts from your email client to that address.
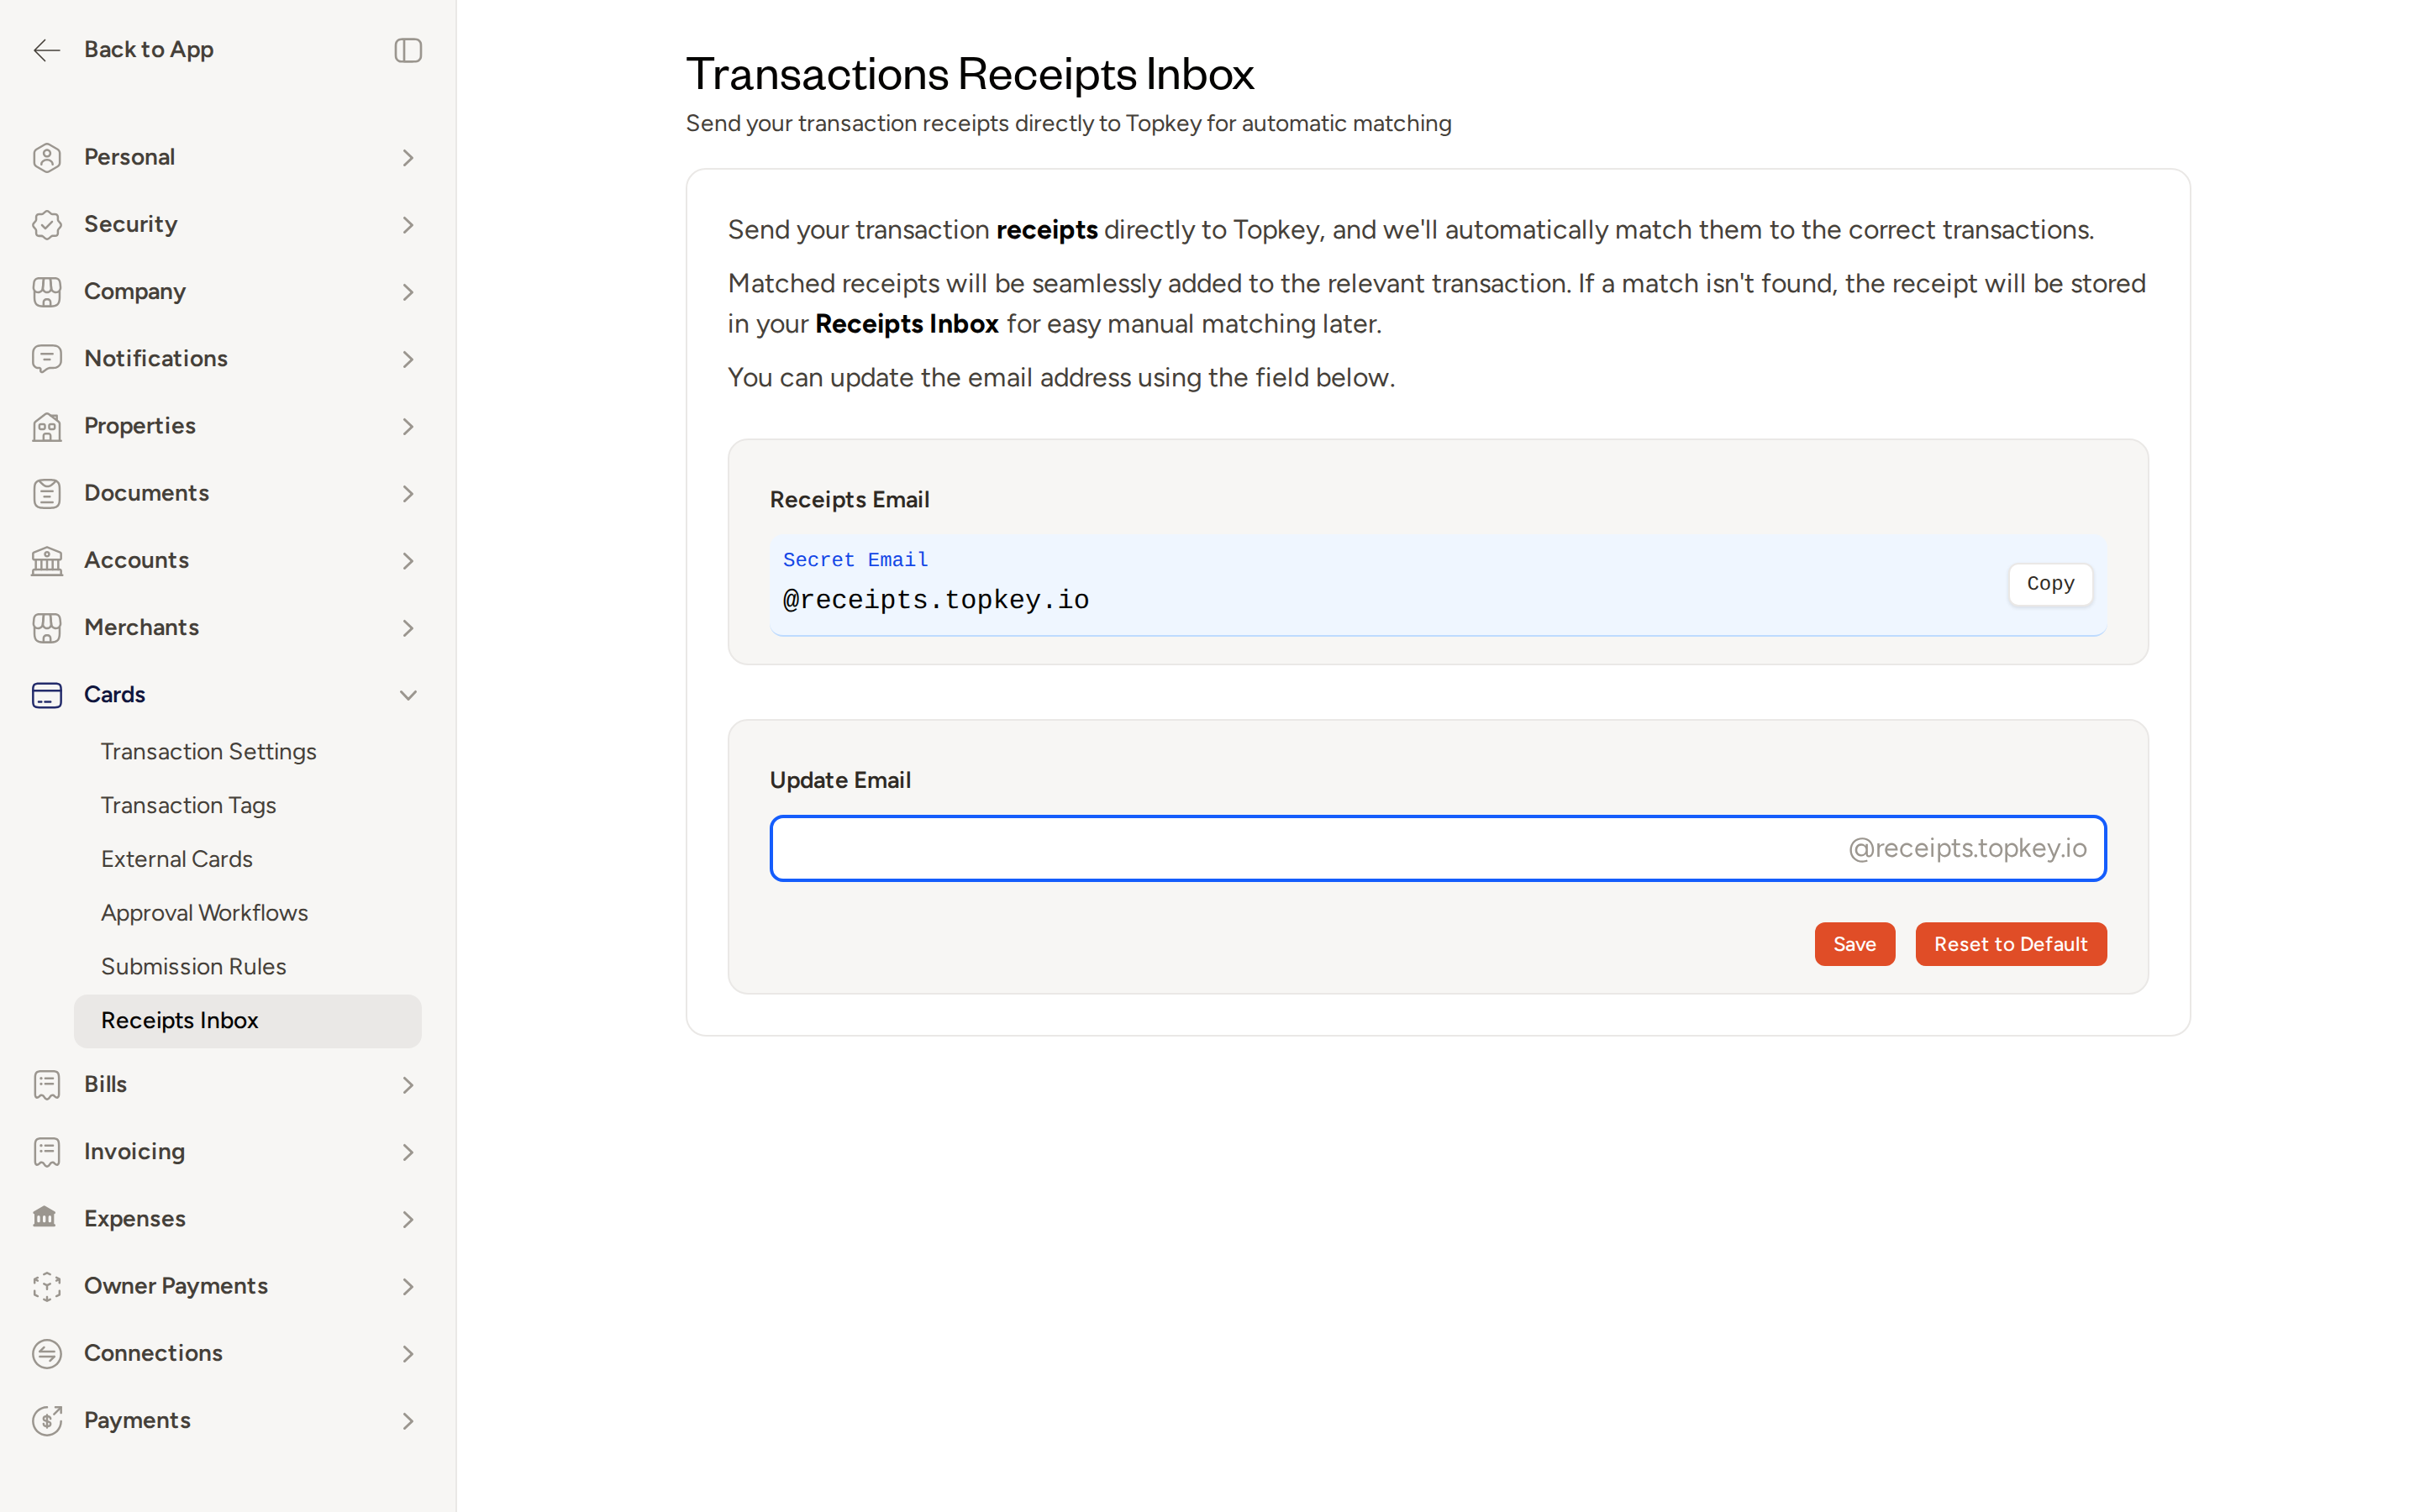
You can customize your receipt forwarding address using the Update Email field on the same settings page. Select Save to apply your changes, or Reset to Default to revert to the original address.
Your receipts email address is unique to your account. Keep it private — anyone who sends to this address can submit receipts to your inbox.
Option 2: Direct Upload
You can also upload a receipt image or PDF directly from within a transaction's detail view. Drag and drop your file onto the upload area, or select it from your device.
Supported file formats:
- JPG
- PNG
- PDF (including multi-page receipts with line items)
The Receipts Inbox
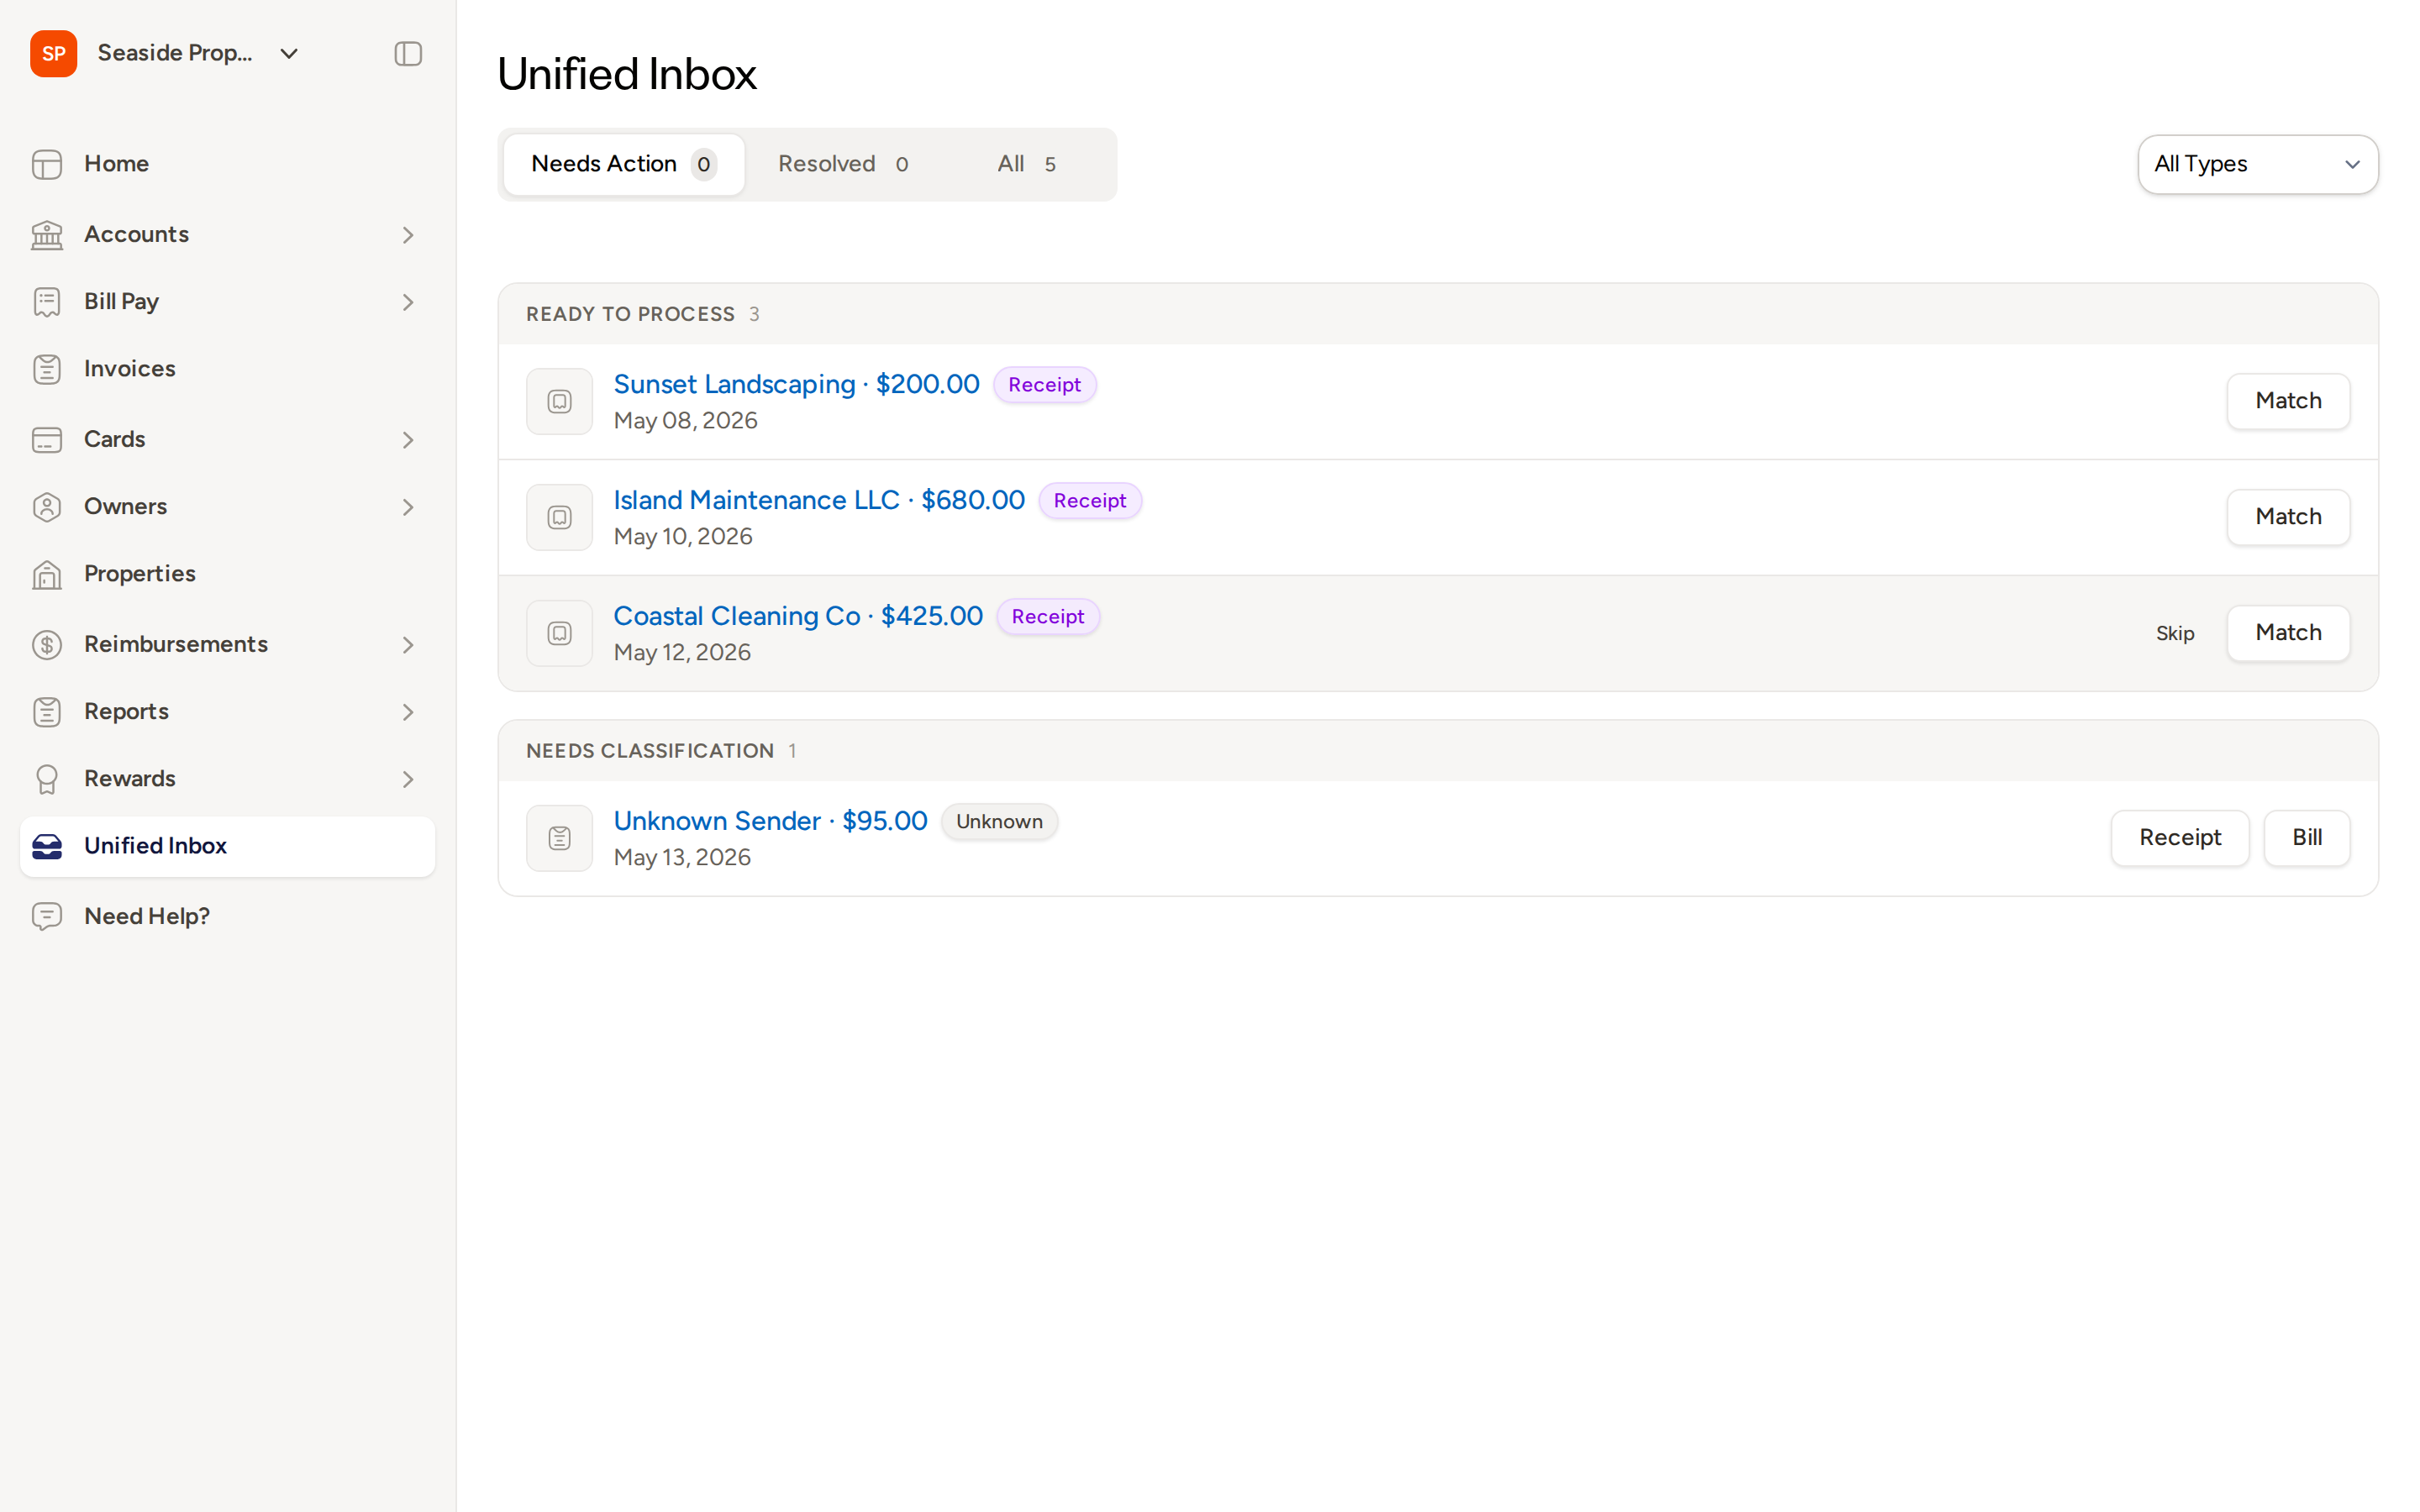
All receipts sent to Topkey — whether by email or upload — appear in the Receipts Inbox. To access it, select Unified Inbox in the left navigation.
The inbox organizes receipts into tabs:
- Needs Action — receipts that are pending a match or need your attention
- Resolved — receipts that have been matched or otherwise processed
- All — every receipt received, regardless of status
Within the Needs Action tab, receipts are grouped into two sections:
- Ready to Process — receipts where Topkey has extracted details and is ready to attempt or confirm a match
- Needs Classification — receipts where the type could not be determined automatically; you can classify them as a Receipt or a Bill
Automatic Matching
After extracting details from a receipt, Topkey searches your transaction history for a transaction with a matching merchant, amount, and date. If a confident match is found, the receipt is attached to that transaction automatically and moves to the Resolved tab.
If Topkey finds multiple transactions that could be a match and cannot determine the correct one with confidence, the receipt is flagged for your review rather than matched automatically. This prevents receipts from being attached to the wrong transaction.
Manual Matching
If automatic matching does not find a transaction, the receipt appears in the Ready to Process section of the Needs Action tab with a Match button.
To manually match a receipt:
- In the Receipts Inbox, locate the receipt under Ready to Process.
- Select Match on the receipt row.
- Search for and select the correct transaction from the list that appears.
- Confirm the match.
Once matched, the receipt moves to the Resolved tab and is attached to the selected transaction.
If a receipt's type is not recognized, it appears under Needs Classification. Select Receipt or Bill to classify it before matching.
Receipt Settings
The Receipts Inbox settings page lets you manage how receipts are received. To access it:
- Go to Settings in the left navigation.
- Under Cards, select Receipts Inbox.
From this page you can:
- View your forwarding email address — copy it to use in your email client
- Update your forwarding email address — enter a new local part and select Save
- Reset to Default — restore the original system-assigned address
Frequently Asked Questions
What happens if a receipt can't be matched to a transaction? The receipt is stored in the Receipts Inbox under the Ready to Process section. You can manually search for and select the correct transaction at any time using the Match button.
Can a receipt be re-matched after it has already been matched? Yes. Open the receipt from the Resolved tab in your Receipts Inbox and update the matched transaction from the receipt detail view.
How long does it take for a receipt to be processed after I forward it? Most receipts are extracted and ready for matching within a few minutes of being received. Processing time may vary depending on the file format and size of the receipt.
Questions? Contact Support