Bill Pay
Creating Bills
Topkey gives you three ways to add bills: upload an invoice file directly, forward vendor emails to your dedicated Topkey address, or have vendors submit invoices through their own Topkey portal access. Once a bill is created, Topkey's AI processing extracts the key details automatically so you can review and submit for payment.
Method 1: Upload an Invoice File
This is the fastest way to add a bill when you already have an invoice on hand.
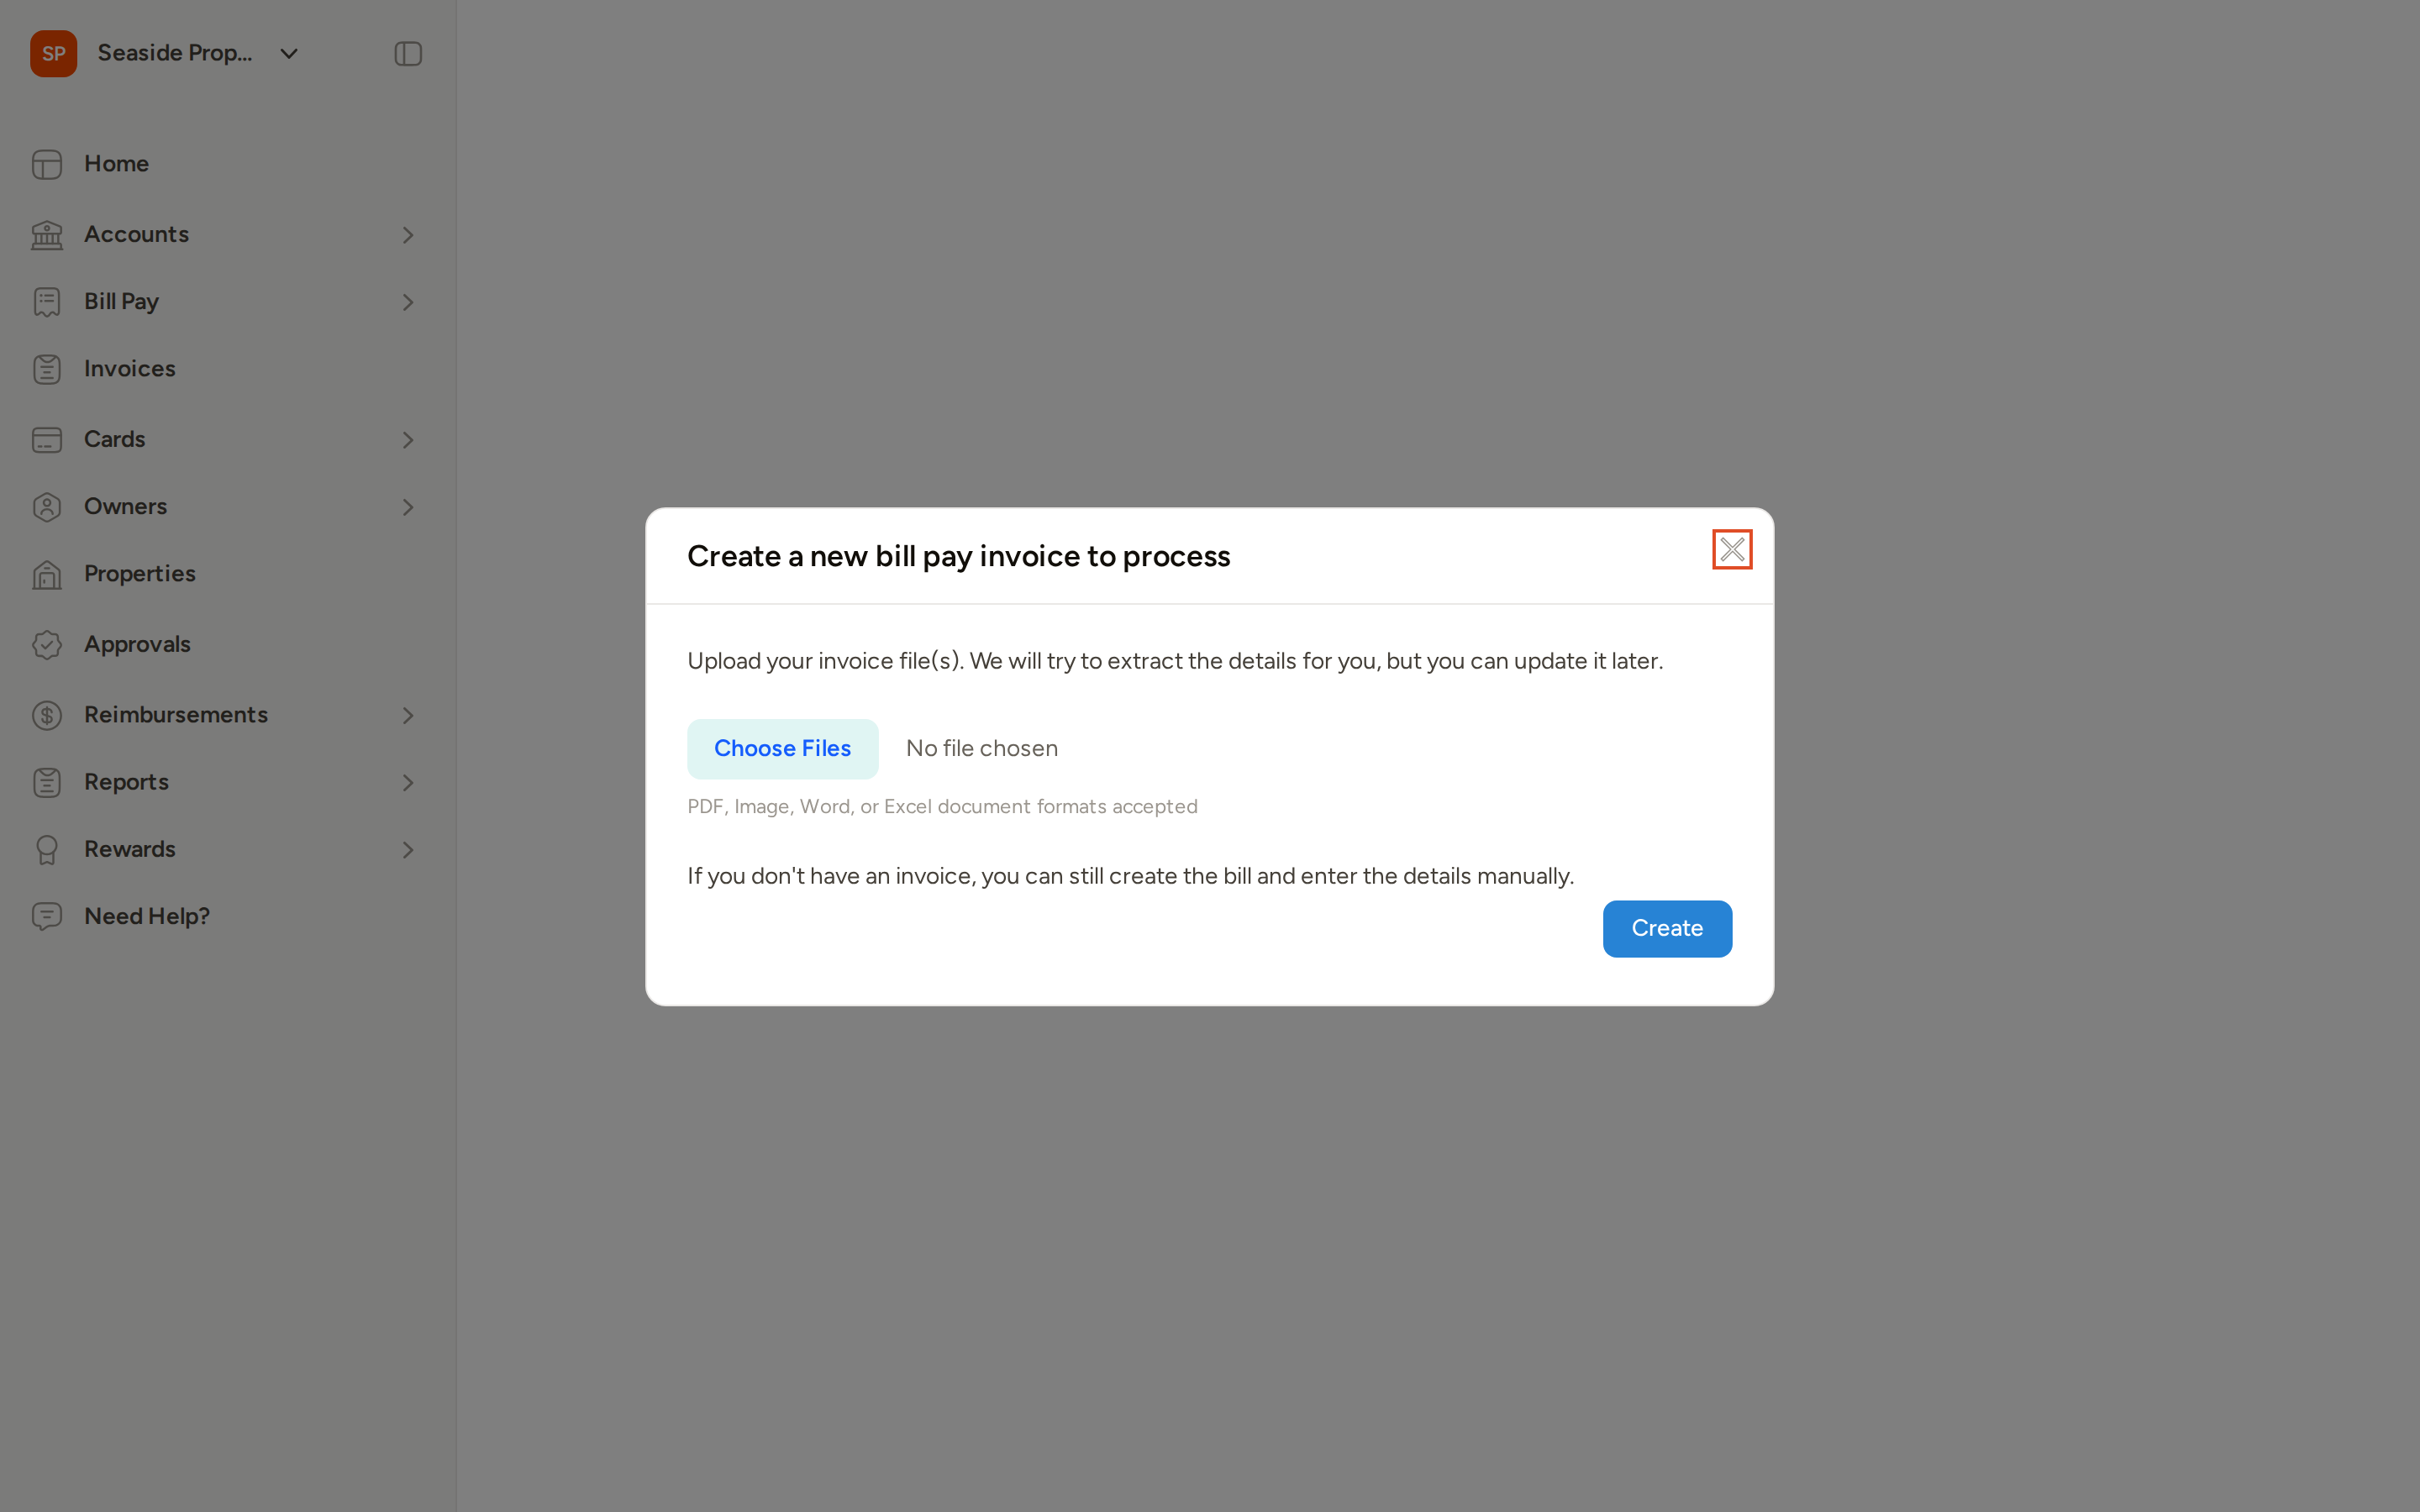
- Navigate to Bill Pay → Bills.
- Click Pay a Vendor.
- In the dialog that appears, click Choose Files and select one or more invoice files from your computer.
- Click Create.
Topkey will process each file and extract the bill details automatically. The new bill will appear in the Draft tab of your bills list once processing is complete.
Supported File Types
You may upload any of the following formats:
- PDF
.pdf— up to 25 MB - PNG
.png— up to 10 MB - JPEG
.jpg/.jpeg— up to 10 MB - Excel
.xlsx— up to 10 MB - CSV
.csv— up to 10 MB
PDFs support a higher size limit (25 MB) than all other file types (10 MB each). Files outside these supported formats will be rejected during upload.
You can upload multiple files at once — Topkey will create a separate bill for each file.
Method 2: Forward Emails from Vendors
If vendors send invoices directly to your email, you can forward those messages to your unique Topkey bill-forwarding address. Topkey will extract any invoice attachments and process them automatically.
Finding Your Forwarding Address
- Navigate to Bill Pay → Bills.
- Click Send By Email.
- Your unique forwarding email address is displayed. Copy it and share it with vendors, or use it to forward invoices yourself.
You can also ask vendors to send invoices directly to this address so bills arrive in Topkey without any manual forwarding on your part.
Resetting Your Forwarding Address
If your forwarding address has been compromised or you need to generate a new one, you can reset it from the same Send By Email panel. Click the option to regenerate your address. Your previous address will stop accepting mail immediately, so be sure to update any vendors or email rules that use the old address.
Resetting your forwarding address is permanent. Any emails sent to the old address after the reset will not be delivered to your inbox.
Viewing the Bills Inbox
All emails sent to your forwarding address appear in Bill Pay → Inbox. Each entry shows the date received, the sender and subject, and a processing status.

Use the status tabs to filter your inbox:
- All — every email received, regardless of status
- Pending — emails currently being processed
- Success — emails where an invoice was found and a bill was created
- Failed — emails where processing did not complete
- Error — emails where processing encountered a problem
When an email arrives, Topkey extracts any attachments and runs AI processing to identify and create bill records. Successfully processed emails result in new bills appearing in the Draft tab.
Retrying a Failed Email
Only emails with an Error status are eligible to be retried. To retry:
- Navigate to Bill Pay → Inbox.
- Click the Error tab to filter to emails with errors.
- Find the email you want to reprocess and click Retry.
Topkey will attempt to process the email and its attachments again. If successful, the status will update to Success and the bill will appear in your Draft tab.
Method 3: Vendor Portal Upload
If a vendor has been granted access to your Topkey account, they can upload invoices directly through their own portal. Bills submitted this way appear in your Draft tab for review, just like bills created through the other methods.
Creating a Bill Without an Invoice File
If you don't have an invoice on hand, you can still create a bill and enter the details manually.
- Navigate to Bill Pay → Bills.
- Click Pay a Vendor.
- Leave the file picker empty — do not select any files.
- Click Create.
Topkey creates a blank bill and opens it for editing. You can fill in the vendor, amount, due date, and line items manually.
After Upload: Reviewing OCR-Extracted Details
Once a file has been uploaded or an email has been processed, Topkey's AI attempts to extract the following information from the invoice:
- Vendor name
- Invoice number
- Invoice amount
- Invoice date and due date
- Line items
The bill is placed in the Draft tab. Open the bill to review the extracted details and correct anything that was not captured accurately before submitting.
OCR accuracy depends on the clarity and format of the original invoice. Always review the extracted fields — especially the amount, due date, and line items — before submitting a bill for payment.
OCR Status Indicators
As Topkey processes an uploaded file, the bill will display one of the following statuses:
- Processing — AI extraction is currently running
- Success — details were extracted successfully; review and confirm them
- Error — extraction encountered a problem; you can still edit the bill manually
- No bill detected — Topkey could not identify an invoice in the file; enter the details manually
Frequently Asked Questions
Can I upload more than one invoice at a time? Yes. When you click Choose Files, you can select multiple files at once. Topkey will create a separate bill for each file and process them individually.
What should I do if the forwarding email address stops working or receives unwanted submissions? You can reset your forwarding address at any time from the Send By Email panel on the Bill Pay → Bills page. Once reset, the old address is immediately deactivated and a new unique address is generated. Update any vendors or forwarding rules with the new address.
What happens if the OCR misreads part of my invoice? Open the bill from the Draft tab and correct any fields that were extracted incorrectly. All extracted fields are fully editable before you submit the bill. If Topkey was unable to extract details at all, you can enter everything manually.