Bill Pay
Bill Pay Overview
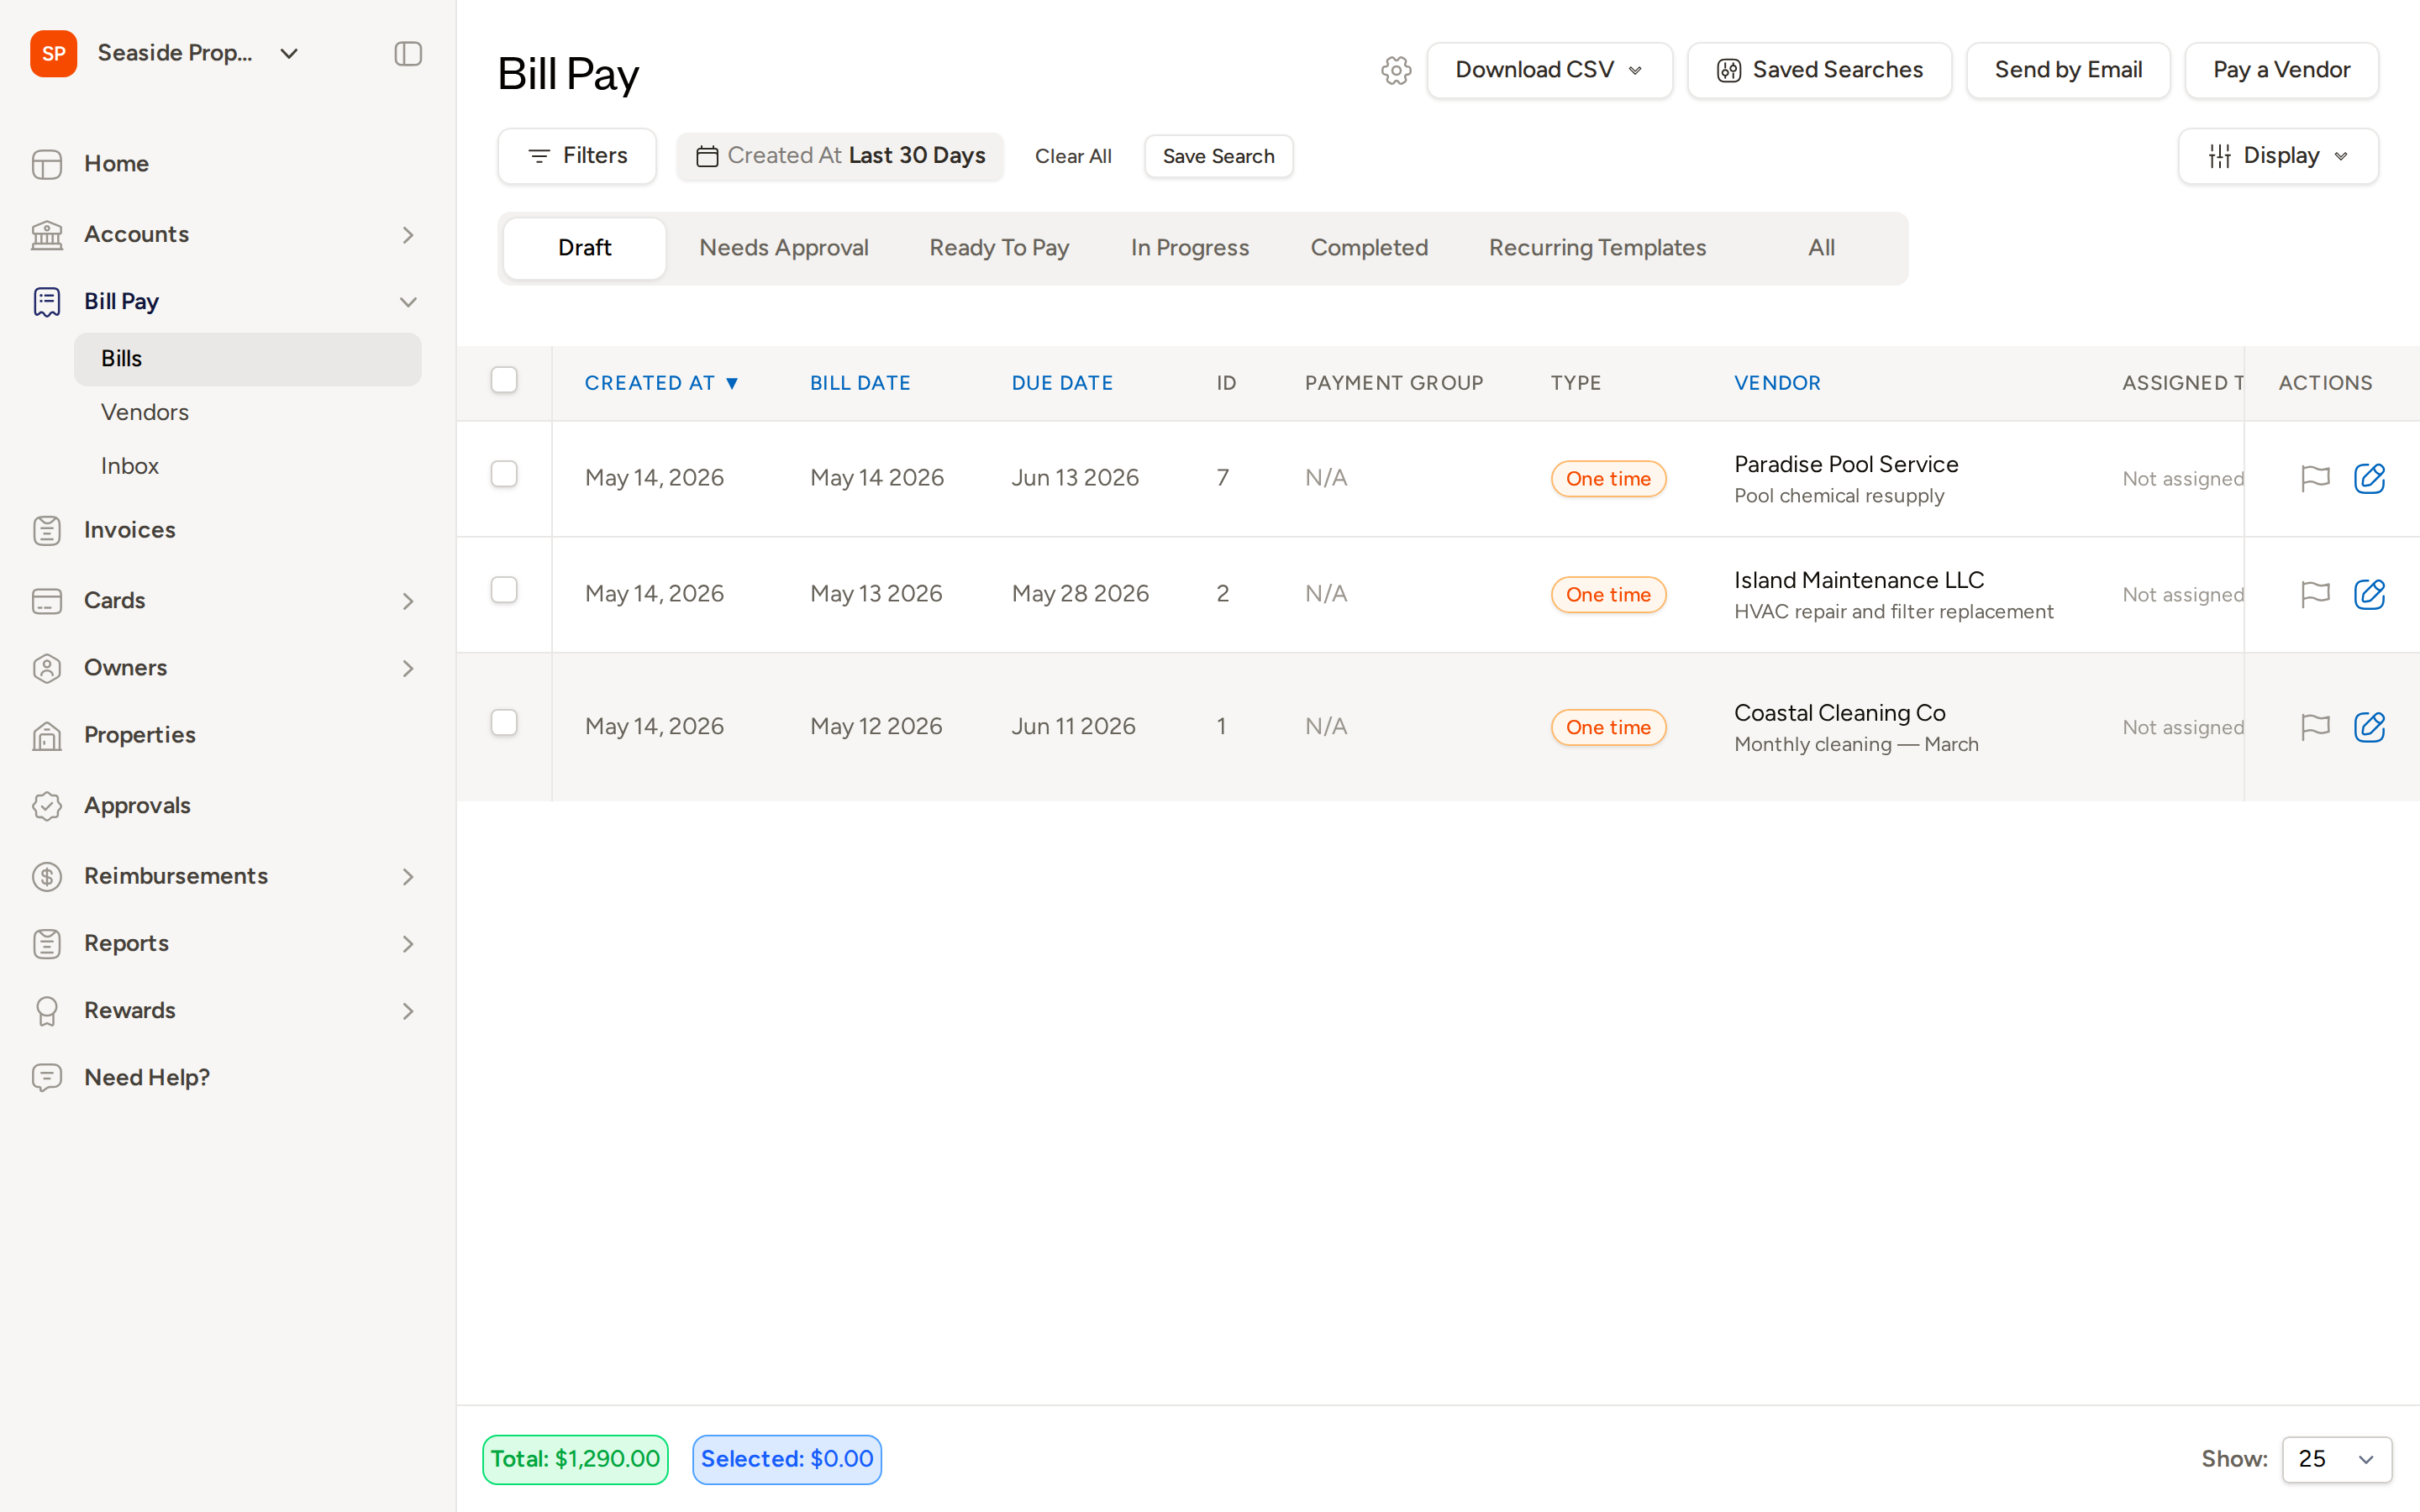
The Bill Pay dashboard is your central hub for managing vendor bills from creation through payment. From here you can create new bills, track each bill's progress through the approval and payment workflow, and take action on multiple bills at once.
Navigating to Bill Pay
To open the Bill Pay dashboard, select Bill Pay in the left navigation, then click Bills. The page displays all bills for your account in a sortable, filterable table.
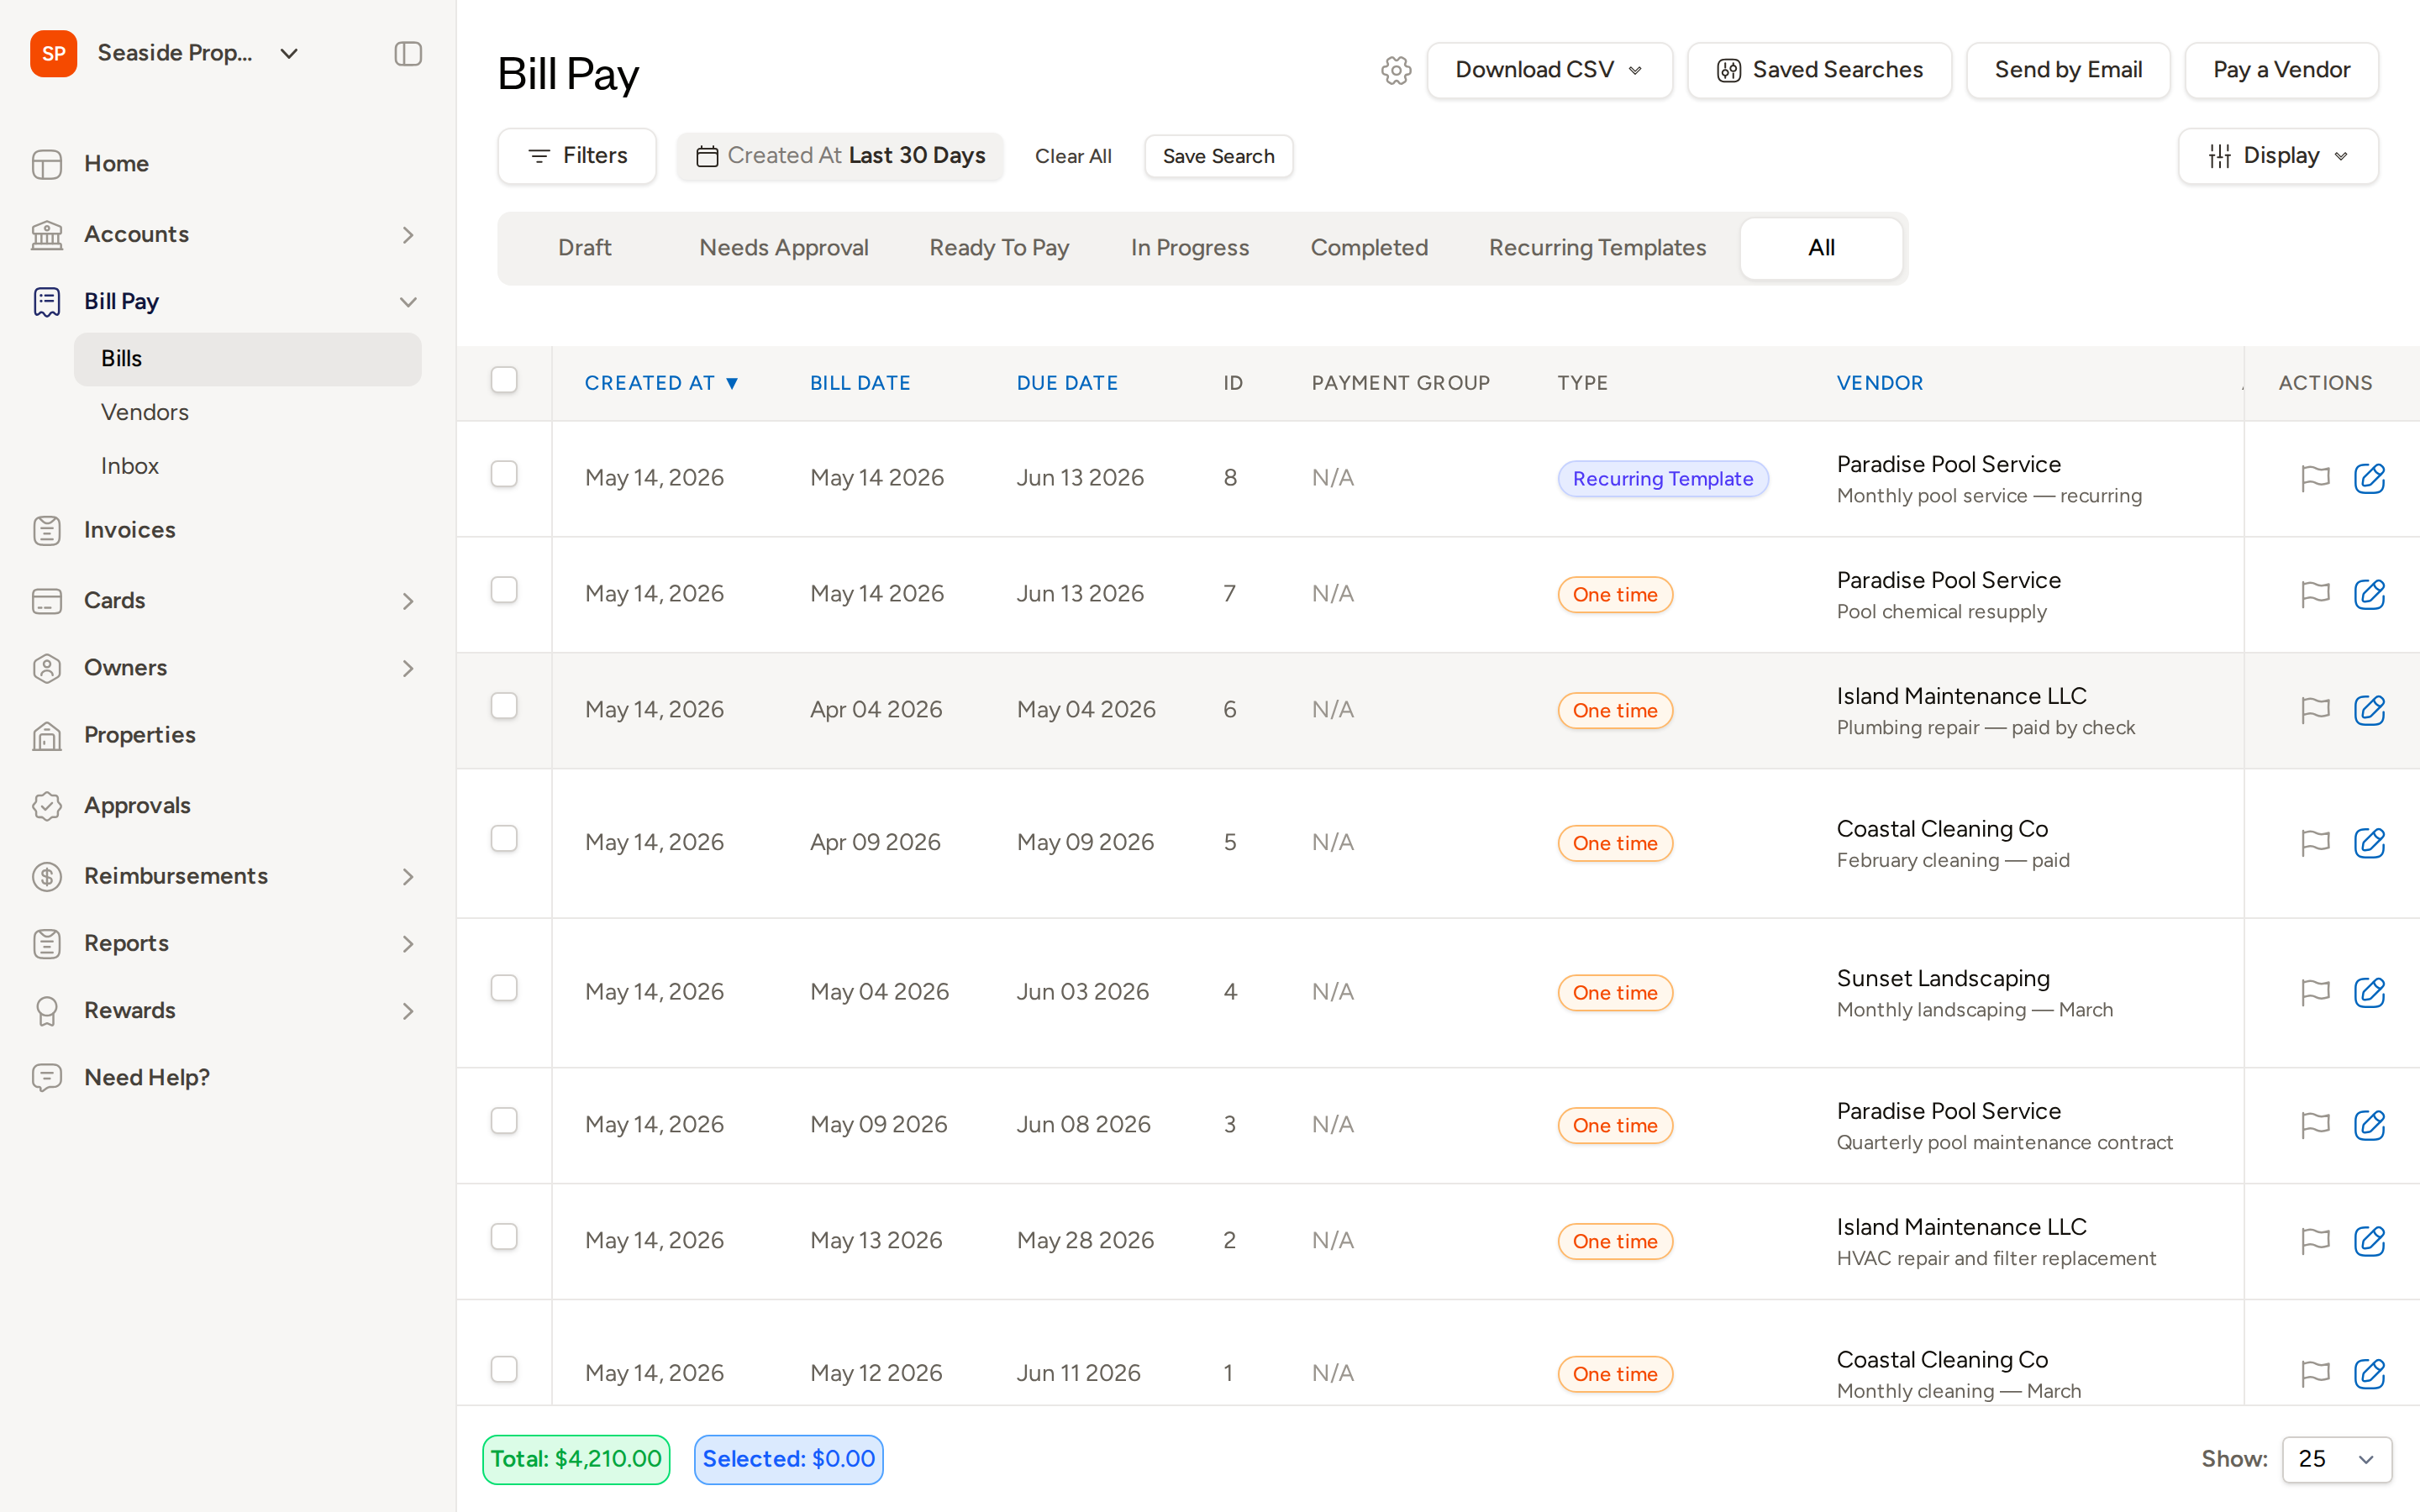
At the bottom of the table you will always see two running totals:
- Total — the sum of all bills currently displayed based on your active filters
- Selected — the sum of only the bills you have checked
Creating a New Bill
Click Pay a Vendor in the top-right corner of the Bill Pay page to create a new bill. You can upload an invoice file and Topkey will automatically extract key details such as the vendor name, due date, bill date, and invoice number, or you can create a blank bill and enter the details manually.
You can also send bills directly to Topkey by forwarding vendor emails. Navigate to Bill Pay → Bills and click Send by Email to find your unique forwarding address.
Bulk Actions
You can act on multiple bills at once by selecting the checkboxes next to each bill (or using the checkbox in the header row to select all visible bills). Once at least one bill is selected, a bulk actions toolbar appears with the following options:
- Submit — submit one or more Draft bills for approval in a single step
- Delete — permanently remove the selected bills
- CSV export — download the selected bills as a CSV file
- Invoice download — download the original invoice files attached to the selected bills
- More — additional bulk actions available depending on the current bill state
Use bulk submit to quickly move a batch of reviewed Draft bills into the approval queue without opening each one individually.
Searching and Filtering Bills
Use the Filters bar at the top of the bill list to narrow the displayed bills. You can filter by:
- Vendor — find bills from a specific vendor
- Amount — filter by bill amount or amount range
- Date — filter by created date, bill date, or due date
- Property — show bills associated with a specific property
- Status — limit the list to bills in a particular workflow stage
Click Clear All to remove all active filters and return to the default view. Click Save Search to save the current filter combination for quick access in the future — saved searches are available from the Saved Searches button in the top-right area of the page.
The date filter defaults to Created At: Last 30 Days. Expand the filter to change the date range or switch to a different date field.
Status Tabs
The tabs across the top of the bill list group your bills by where they are in the workflow. Select any tab to see only the bills in that stage. An All tab is also available to view every bill regardless of status.
- Draft — bills that have been created but not yet submitted. Use this tab to review and finish preparing bills before sending them for approval.
- Needs Approval — bills that have been submitted and are waiting for an approver to review them. Bills remain here until they are approved or returned for revision.
- Ready To Pay — bills that have been approved and are eligible to be paid. This is your action queue for scheduling or initiating payments.
- In Progress — bills whose payment has been scheduled or is currently processing. No further action is required unless a payment fails.
- Completed — bills that have been fully paid. Use this tab for historical reference and reconciliation.
- Recurring Templates — template bills tied to a recurring schedule. These are not themselves payable bills; they serve as the source from which future recurring bills are automatically generated.
Recurring Templates will display a Recurring Template badge in the Type column so they are easy to distinguish from one-time bills.
Table Columns
The bill list table includes the following columns by default. You can show, hide, and reorder columns using the Display button in the top-right corner of the page — your preferences are saved automatically.
| Column | Description |
|---|---|
| Created At | The date the bill was created in Topkey |
| Bill Date | The date shown on the vendor's invoice |
| Due Date | The payment due date |
| ID | Topkey's internal bill identifier |
| Payment Group | The payment group the bill belongs to, if any |
| Type | One time or Recurring Template |
| Vendor | The vendor name and bill description |
| Assigned To | The team member assigned to manage the bill |
| Invoice # | The invoice number from the vendor |
| Property | The property associated with the bill |
| Bill / Assign To | The category or entity the bill is assigned to |
| Paid On | The date payment was completed |
| Origin Account | The bank account used to pay the bill |
| Status | The current workflow status |
| Amount | The total bill amount |
| Tags | Any tags applied to the bill |
| Actions | Quick-action icons for editing or flagging the bill |
Click any blue column header — Created At, Bill Date, Due Date, Vendor, or Amount — to sort the table by that column. Click again to reverse the sort order.
Frequently Asked Questions
Why don't I see a bill I just created? The default date filter shows bills created in the last 30 days. If you created a bill outside that window, click Filters, expand the date range, or click Clear All to remove the filter and display all bills.
What is the difference between In Progress and Completed? In Progress means the payment has been initiated but has not yet settled — for example, an ACH transfer that is still processing. Completed means the payment has fully cleared and the bill is closed.
Can I recover a bill I accidentally deleted? Deleted bills are not shown in the standard bill list. Contact Support if you need to recover a deleted bill.