Transactions
Transaction Bulk Actions
Transaction bulk actions let you work efficiently across multiple transactions at once — categorizing, approving, exporting, or converting them into expenses without opening each one individually. This is especially useful when you need to process a batch of related purchases at the end of a period.
Step 1: Filter the Transactions List
Before selecting transactions, use the filter bar to narrow the list to only the transactions you want to act on. This prevents accidentally selecting unrelated transactions.
- Go to Cards → Transactions in the left navigation.
- Select Filters to open the filter bar and apply any combination of filters, such as card, cardholder, date range, status, property, or merchant.
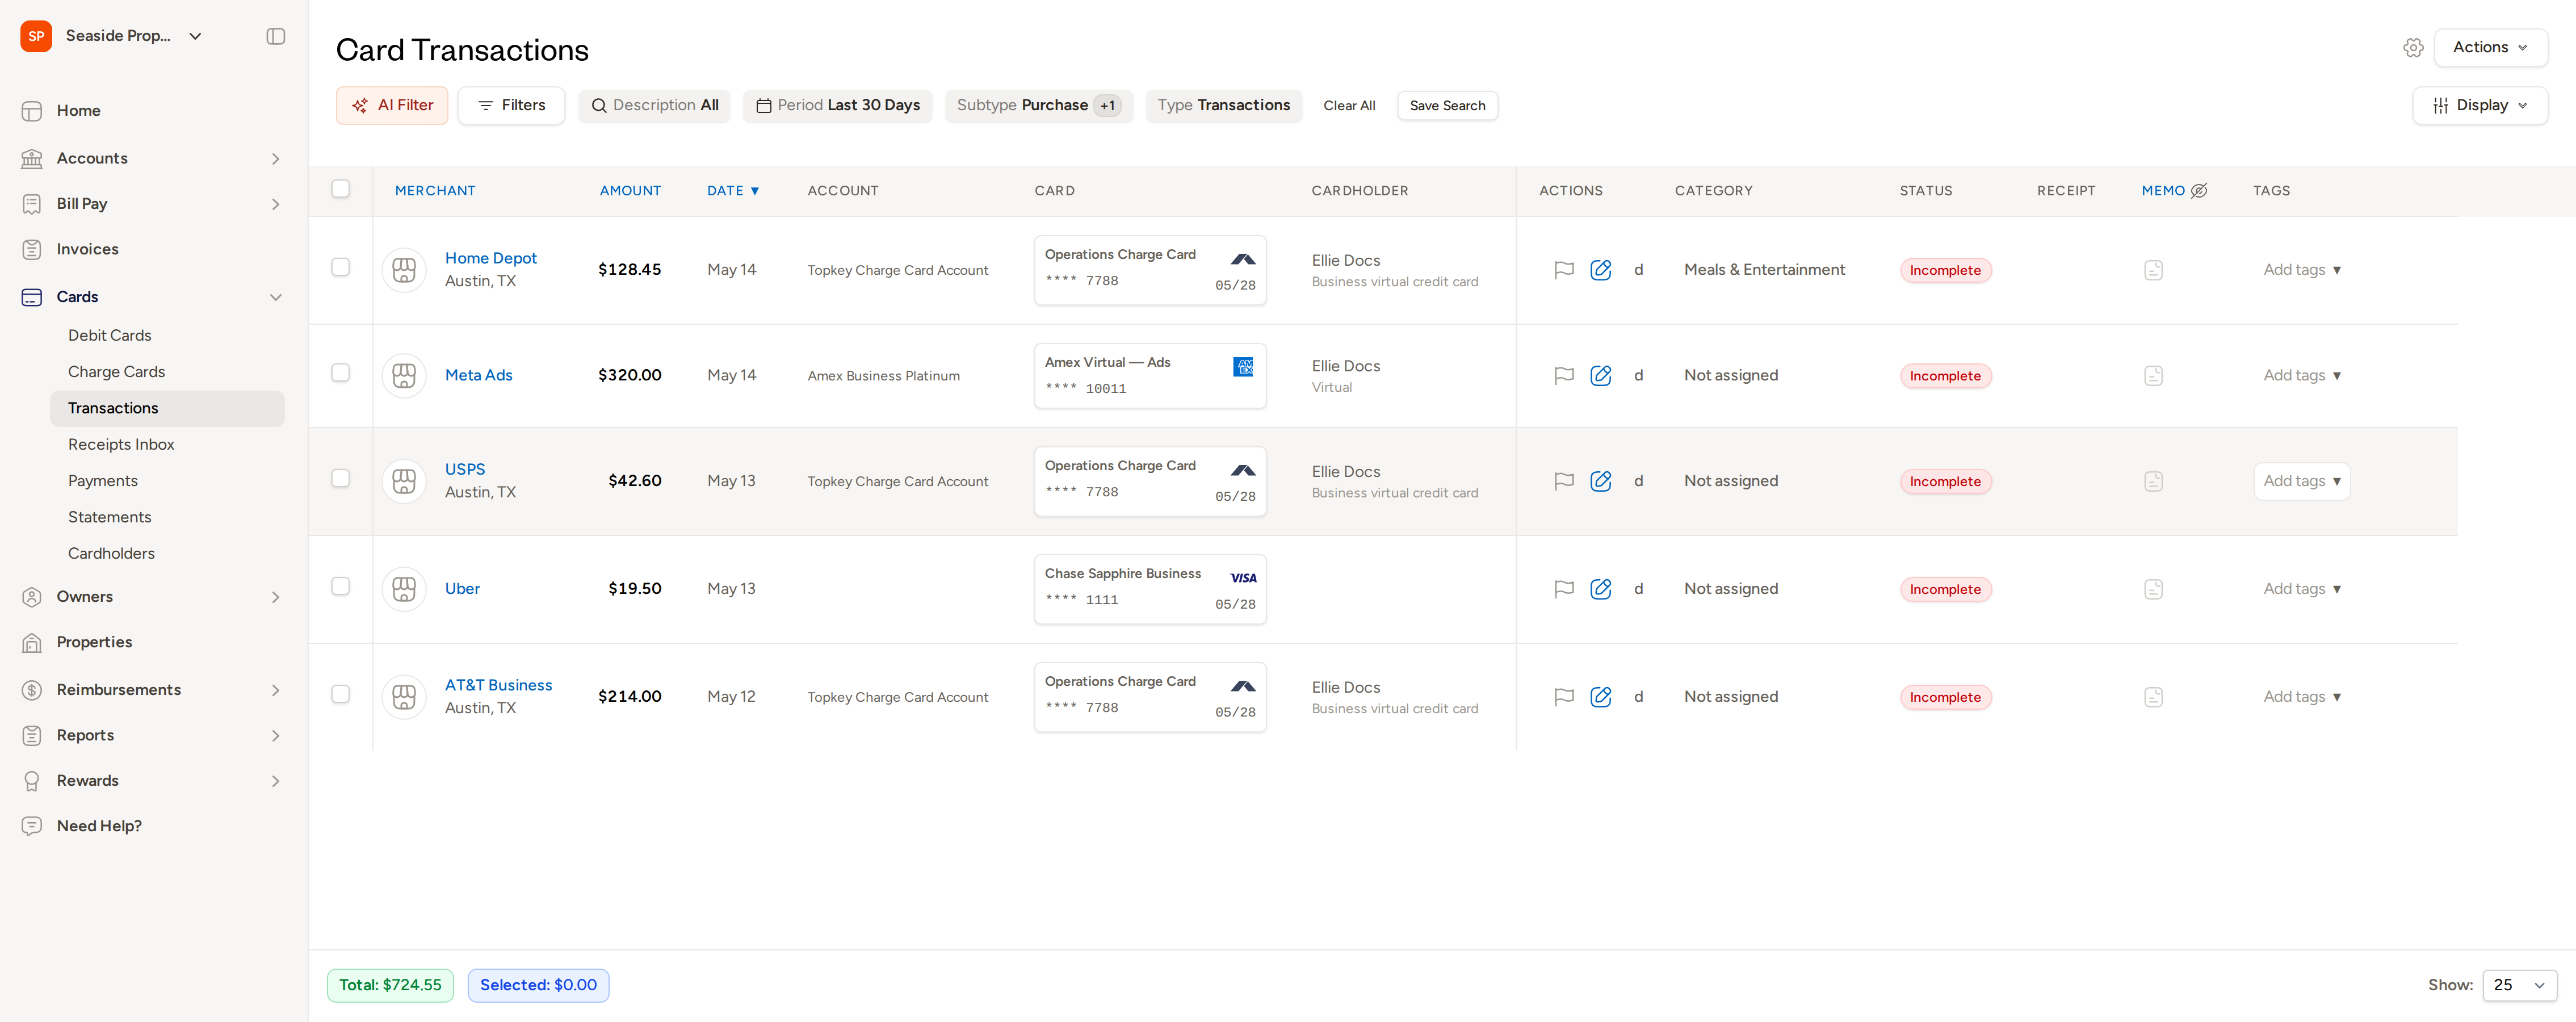
Filter first, then select. The select-all checkbox at the top of the list selects only the transactions visible on the current page — not all pages of results. Narrowing your list with filters first ensures you capture exactly the transactions you intend to act on.
Step 2: Select Transactions
Check the box on the left side of each transaction row you want to include. To select all transactions on the current page at once, check the box in the column header row.
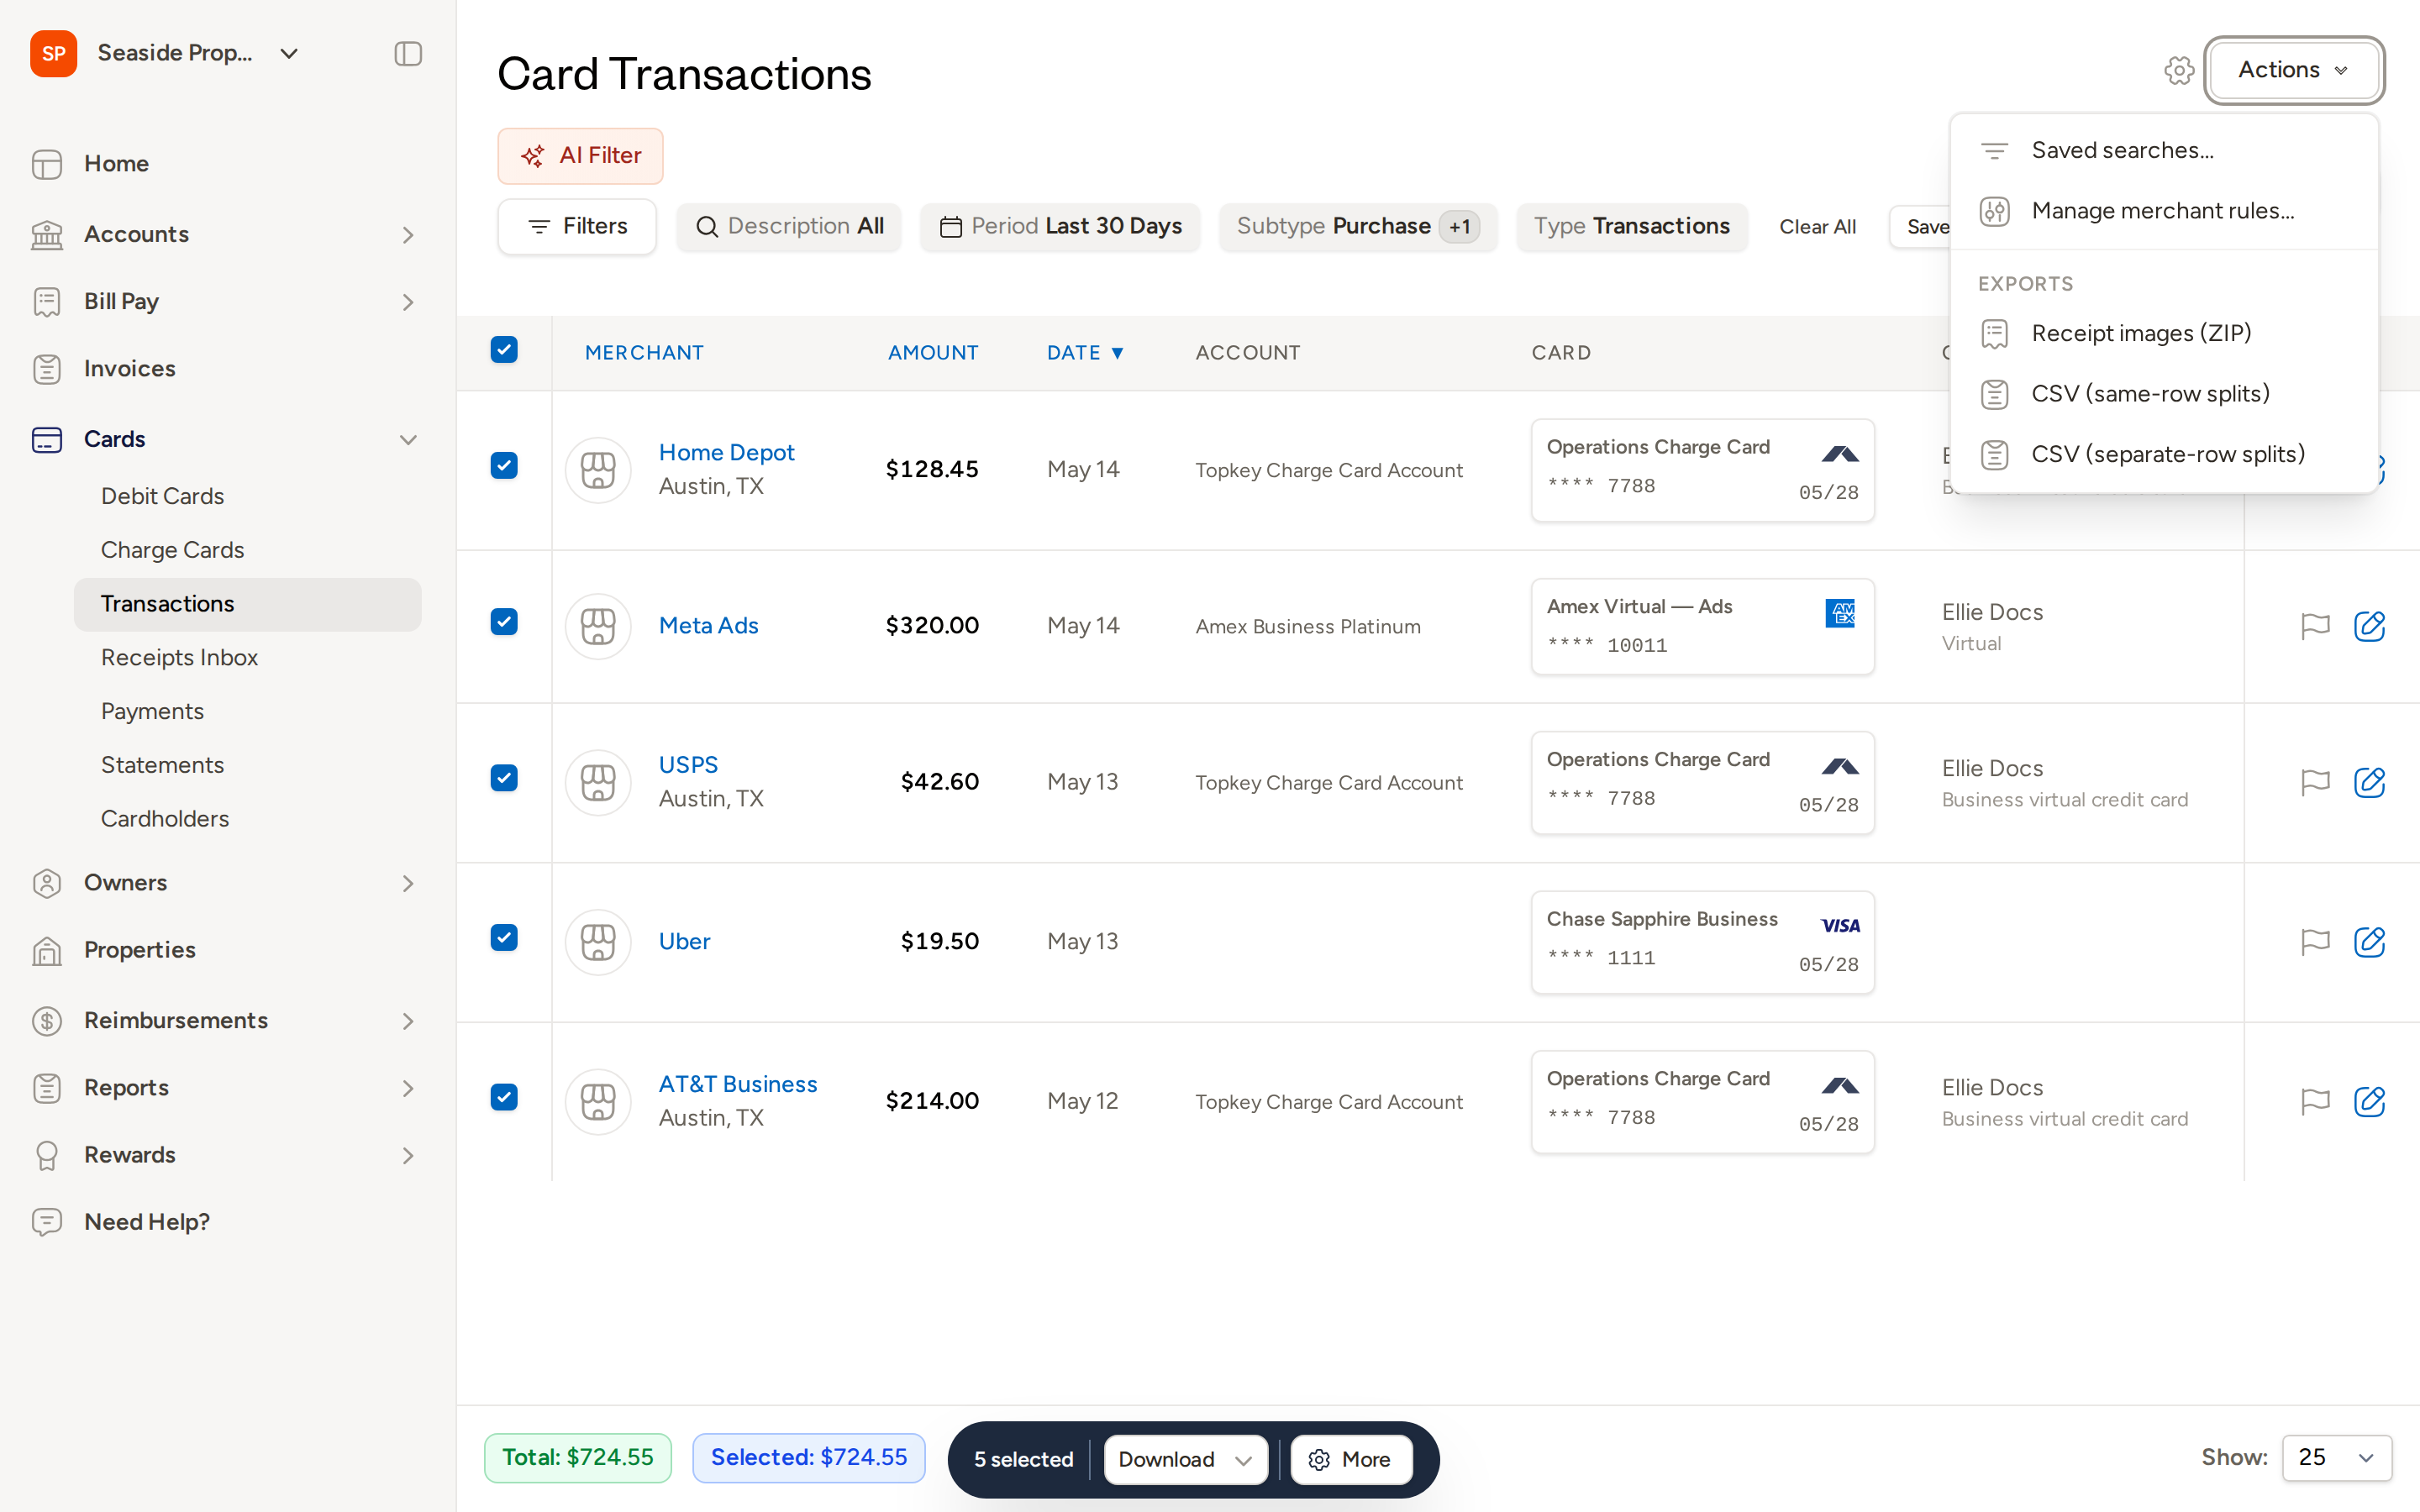
As soon as at least one transaction is selected, a bulk action bar appears at the bottom of the screen. The bar shows how many transactions are selected and their combined total (for example, 5 selected and Selected: $724.55).
Step 3: Choose a Bulk Action
The bulk action bar at the bottom of the screen offers the following options:
Download
Select Download to export the selected transactions. You can choose from:
- Receipt Images (ZIP) — downloads all attached receipt images for the selected transactions as a ZIP file
- CSV (same-row splits) — exports transaction data with split details on the same row
- CSV (separate-row splits) — exports transaction data with each split on its own row
Create Expenses (Work Orders)
If your account is connected to a property management system (PMS), a Create Work Orders button (or the equivalent expense label for your integration) appears in the bulk action bar. This converts each selected transaction into a separate work order — useful for grouping a set of reimbursable purchases and billing them to a property, owner, or guest.
- Select the transactions you want to convert.
- Select Create Work Orders from the bulk action bar.
- The Create Multiple Work Orders wizard opens. Each selected transaction appears as a separate row.
- For each row, fill in the following fields as needed:
- Markup (%) — apply a markup percentage; the Amount with markup column updates automatically
- Property — assign the work order to a specific property
- Performed On — set or adjust the date for each work order
- Name — edit the work order name (pre-filled from the transaction)
- Description — add or edit a description
- Use Default Performed On at the top to set the same date across all rows at once.
- Select Bulk Create to submit all work orders.
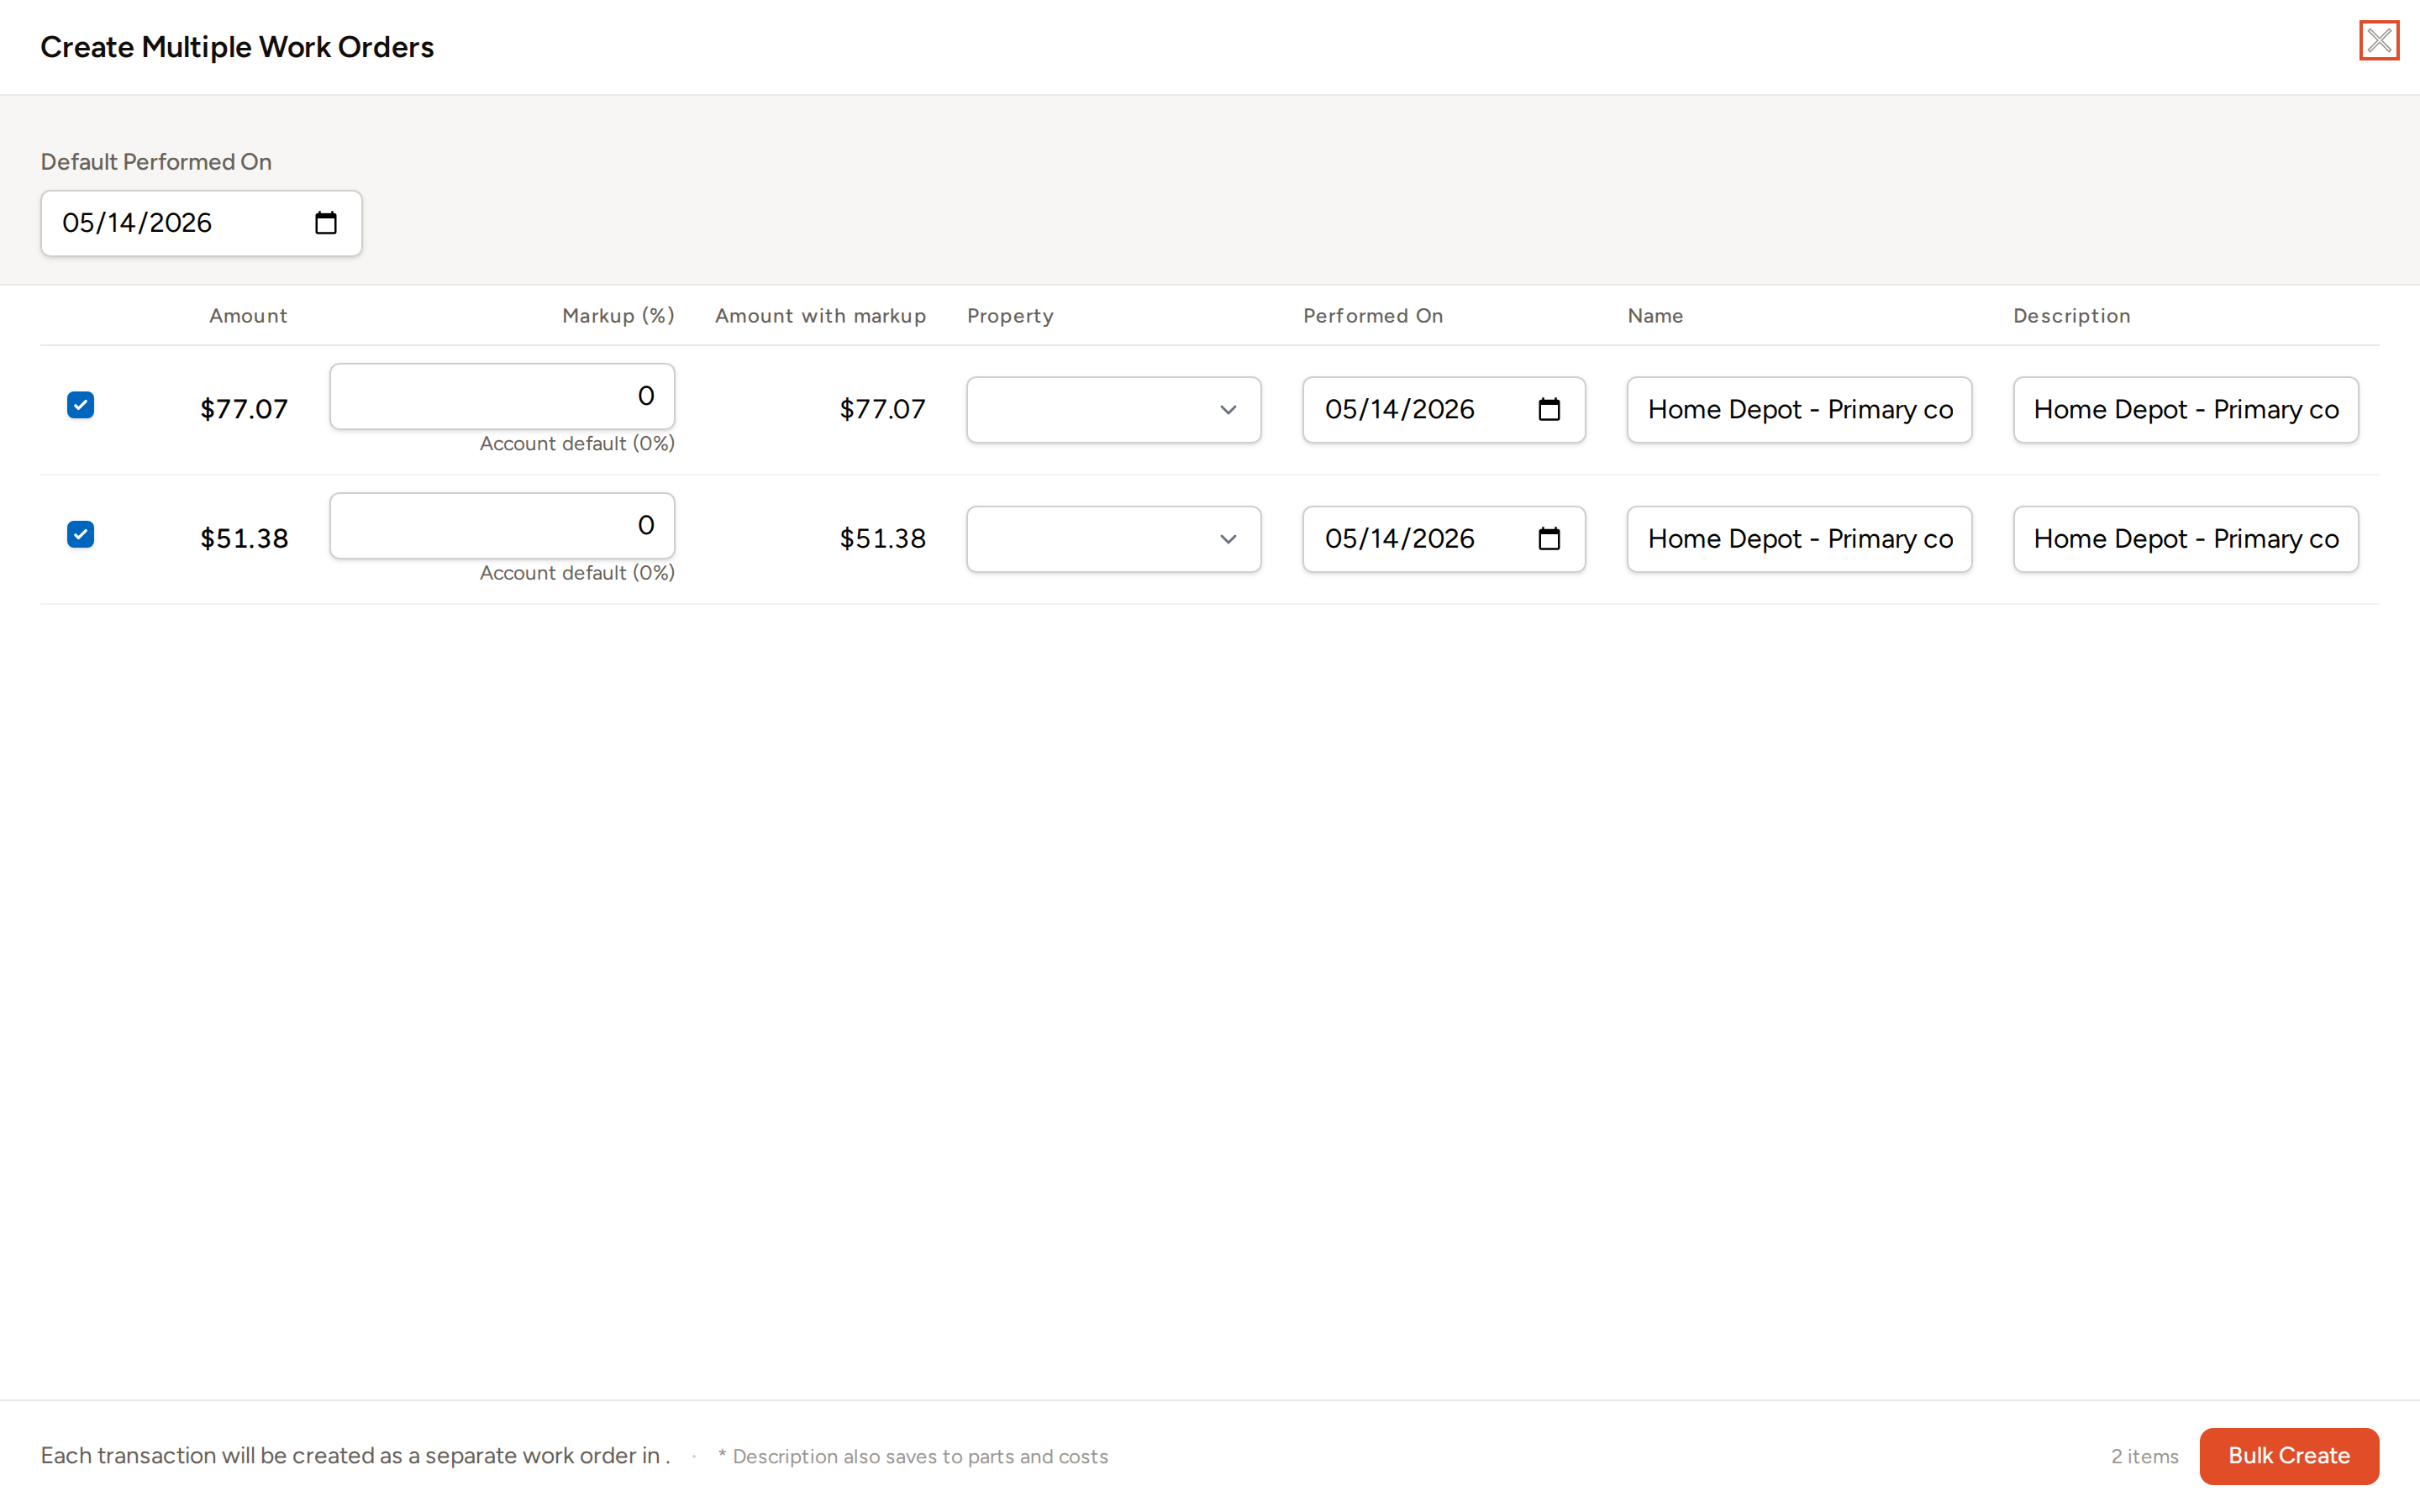
Each selected transaction becomes a separate work order. The total cost, including any markup you apply, rolls up automatically in the Amount with markup column.
You can deselect individual rows in the wizard by unchecking the box on the left side of a row if you decide not to create a work order for a particular transaction.
More Options
Select More in the bulk action bar to access additional bulk actions. The options available depend on your role and the current state of the selected transactions:
| Action | What it does |
|---|---|
| Add Property | Assigns a property to all selected transactions |
| Add Category | Applies a category to all selected transactions |
| Submit for Approval | Submits all selected transactions for approval in one action |
| Approve | Approves all selected transactions (requires approval permission) |
| Reject | Rejects all selected transactions (requires approval permission) |
| Flag | Flags all selected transactions for follow-up |
| Add/Remove Tags | Adds or removes tags across all selected transactions |
| Assign GL Code | Sets the GL code for all selected transactions (available when an accounting integration is active) |
Not all actions appear for every account or user. For example, Approve is only available to users with approval permission — other users see Submit for Approval instead. Actions that don't apply to the current state of the selected transactions (such as approving an already-approved transaction) are either hidden or disabled.
Tracking Bulk Operation Progress
Most bulk actions run in the background. When a bulk action is started, a notification appears confirming it has been submitted. You can monitor the progress of any running or completed bulk operation by navigating to the Bulk Operations page. Select the link in the confirmation notification, or go to Bulk Operations directly from your account navigation.
If a bulk action partially fails — for example, some transactions could not be updated due to their current state — the Bulk Operations page will show a count of successes and failures so you can identify and address the exceptions.
Frequently Asked Questions
Why don't I see the Create Work Orders button in the bulk action bar? This button only appears when your account is connected to a property management system (PMS) integration that supports work orders or expenses. If your account does not have an active PMS integration, the option will not be shown. Contact your account administrator or Contact Support to confirm your integration settings.
Can I select transactions across multiple pages at once? The select-all checkbox selects only the transactions visible on the current page. To work across a larger set of transactions, apply filters first to scope the list to just the transactions you need, then use select-all on the filtered results. Adjust the number of rows shown per page (using the Show control in the bottom-right corner) to bring more transactions onto a single page.
What happens if I bulk-approve a transaction that is already approved? Transactions that are not eligible for a given action — such as approving an already-approved transaction — are skipped during the bulk operation. The Bulk Operations page will reflect how many transactions were successfully processed and how many were skipped or failed.