Bill Pay
Vendor Management
Vendors are the companies and individuals you pay through Bill Pay — contractors, service providers, and suppliers. Keeping your vendor records complete and up to date ensures bills are routed correctly, payments go to the right account, and your books stay accurate.
Browsing the Vendor List
Navigate to Bill Pay → Vendors to see all vendors associated with your account.
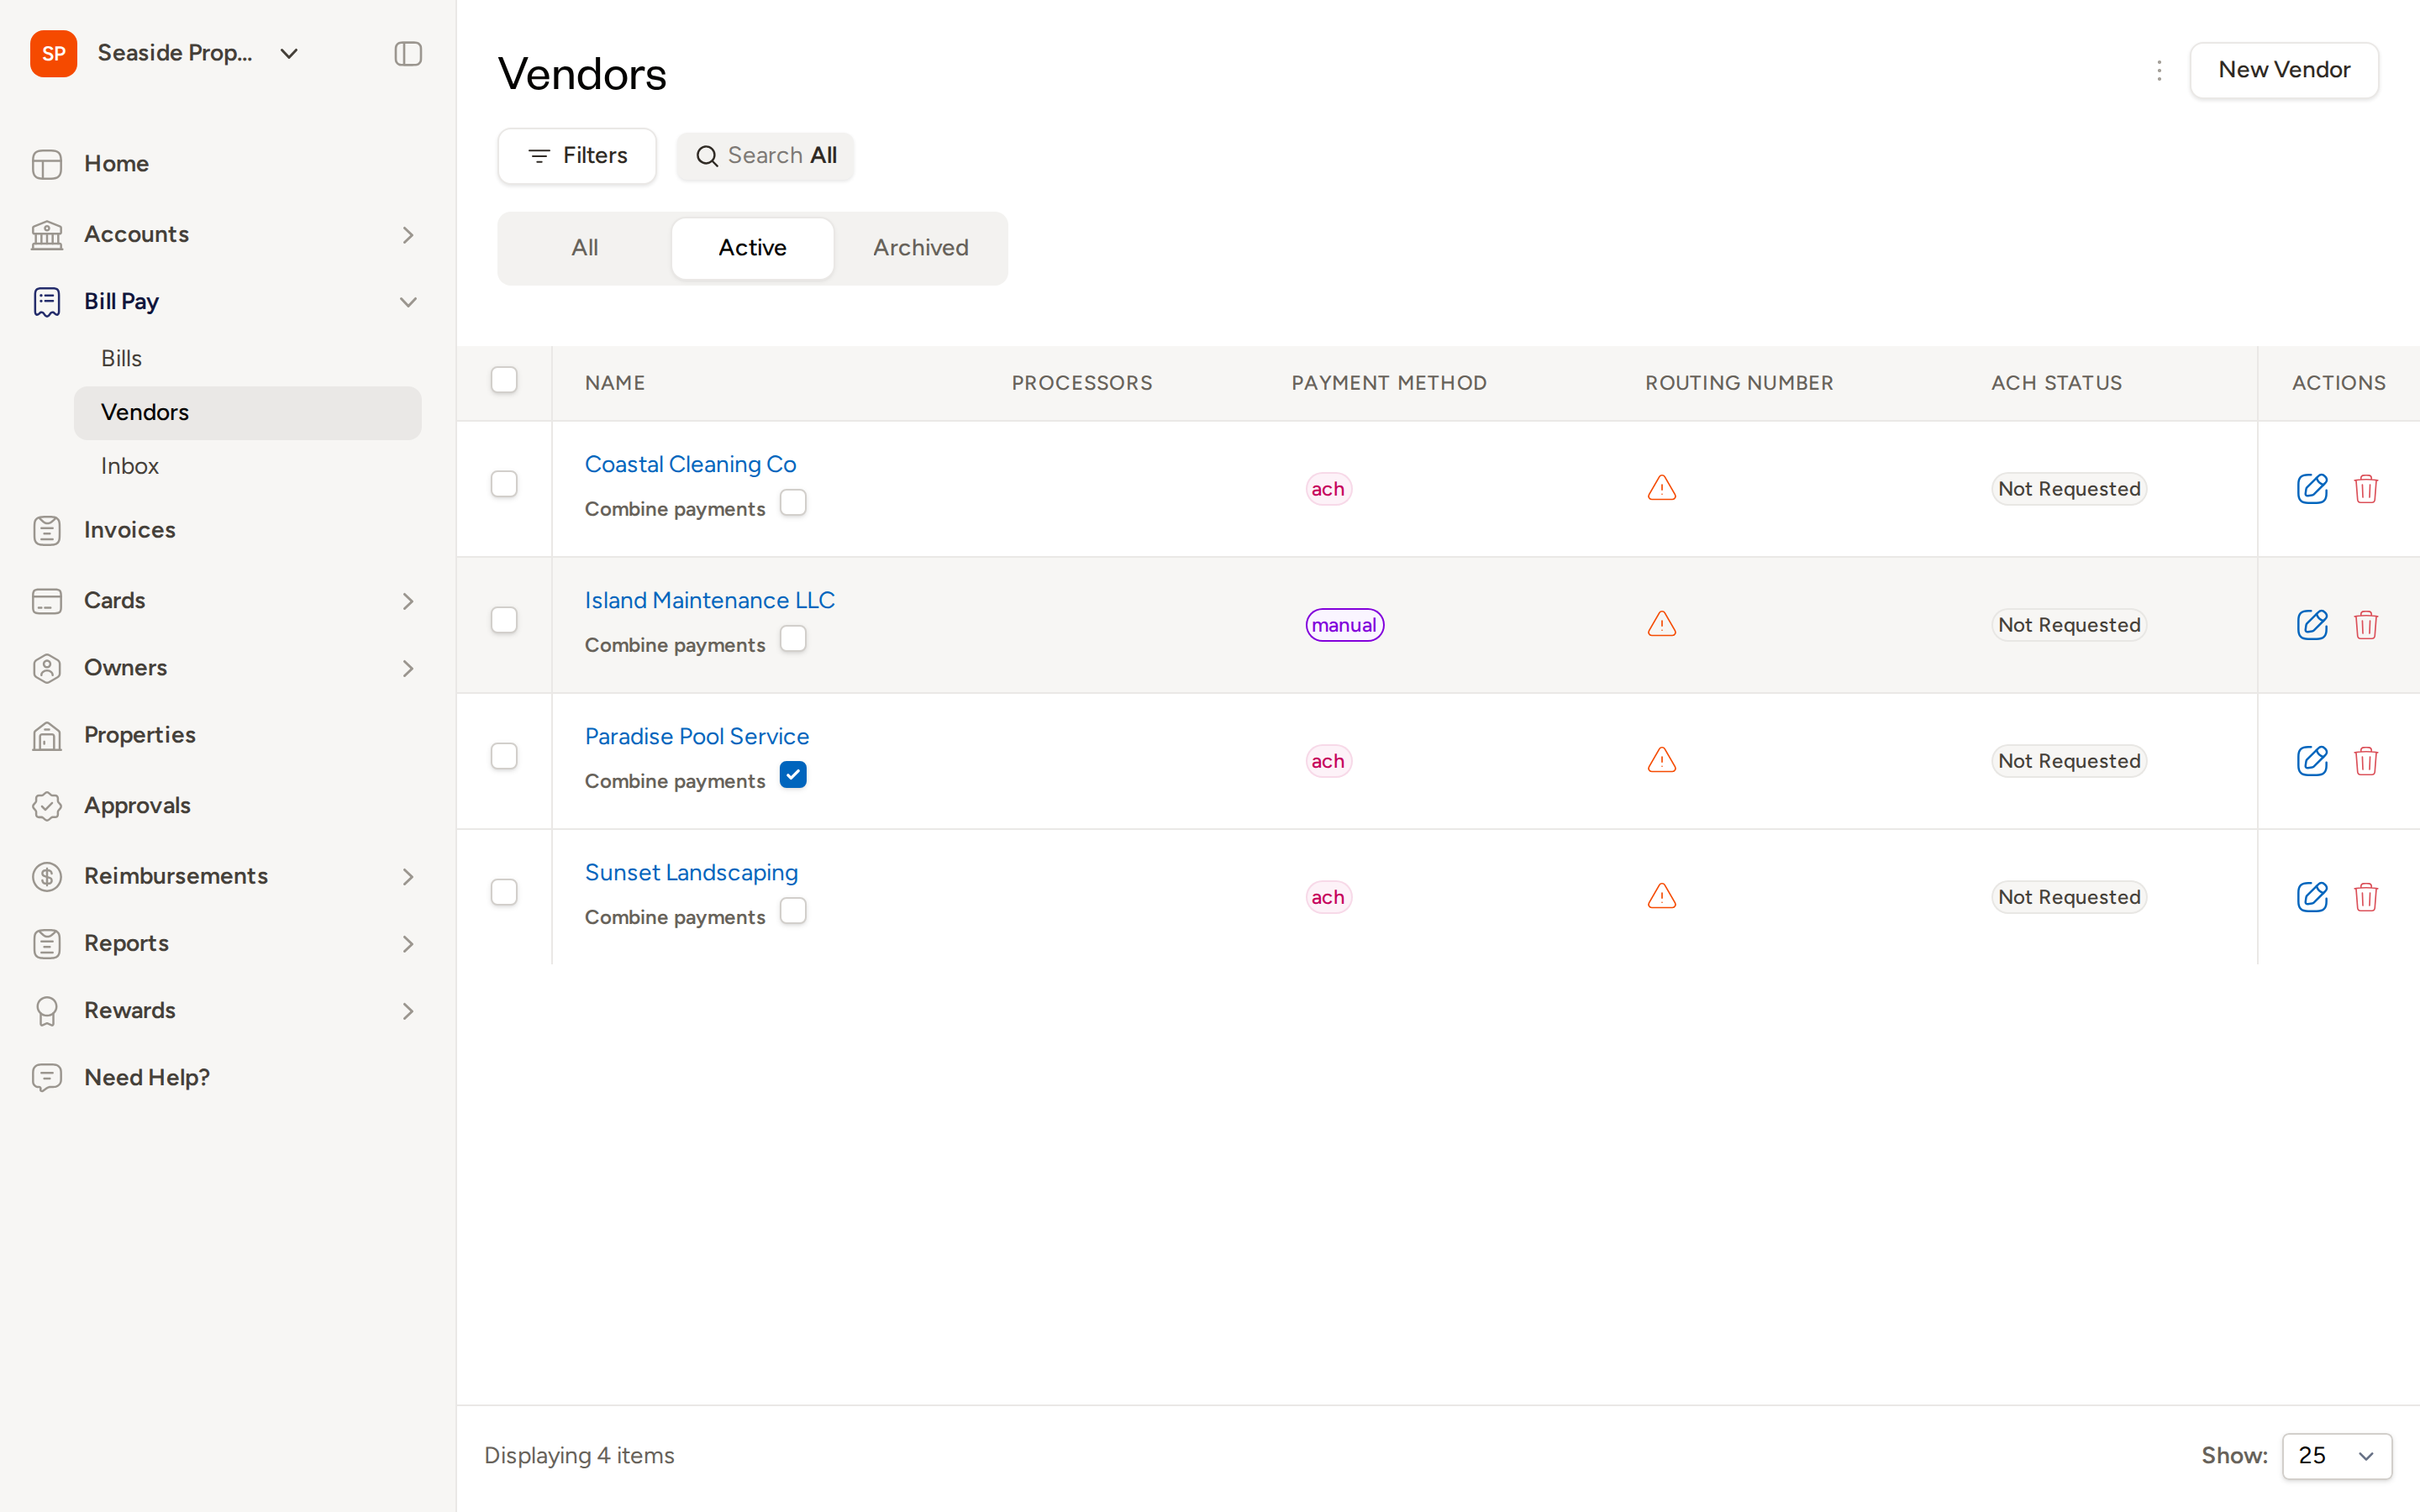
The list shows each vendor's name, assigned processors, payment method, routing number, ACH status, and any tags you've applied. From here you can:
- Use the Search bar to find a vendor by name.
- Click Filters to narrow results by payment method, ACH status, tags, or other criteria.
- Switch between the All, Active, and Archived tabs to view vendors by status.
Creating a New Vendor
- Click New Vendor in the top-right corner of the Vendors page.
- In the New Vendor panel that appears, fill in the vendor's details under General Information:
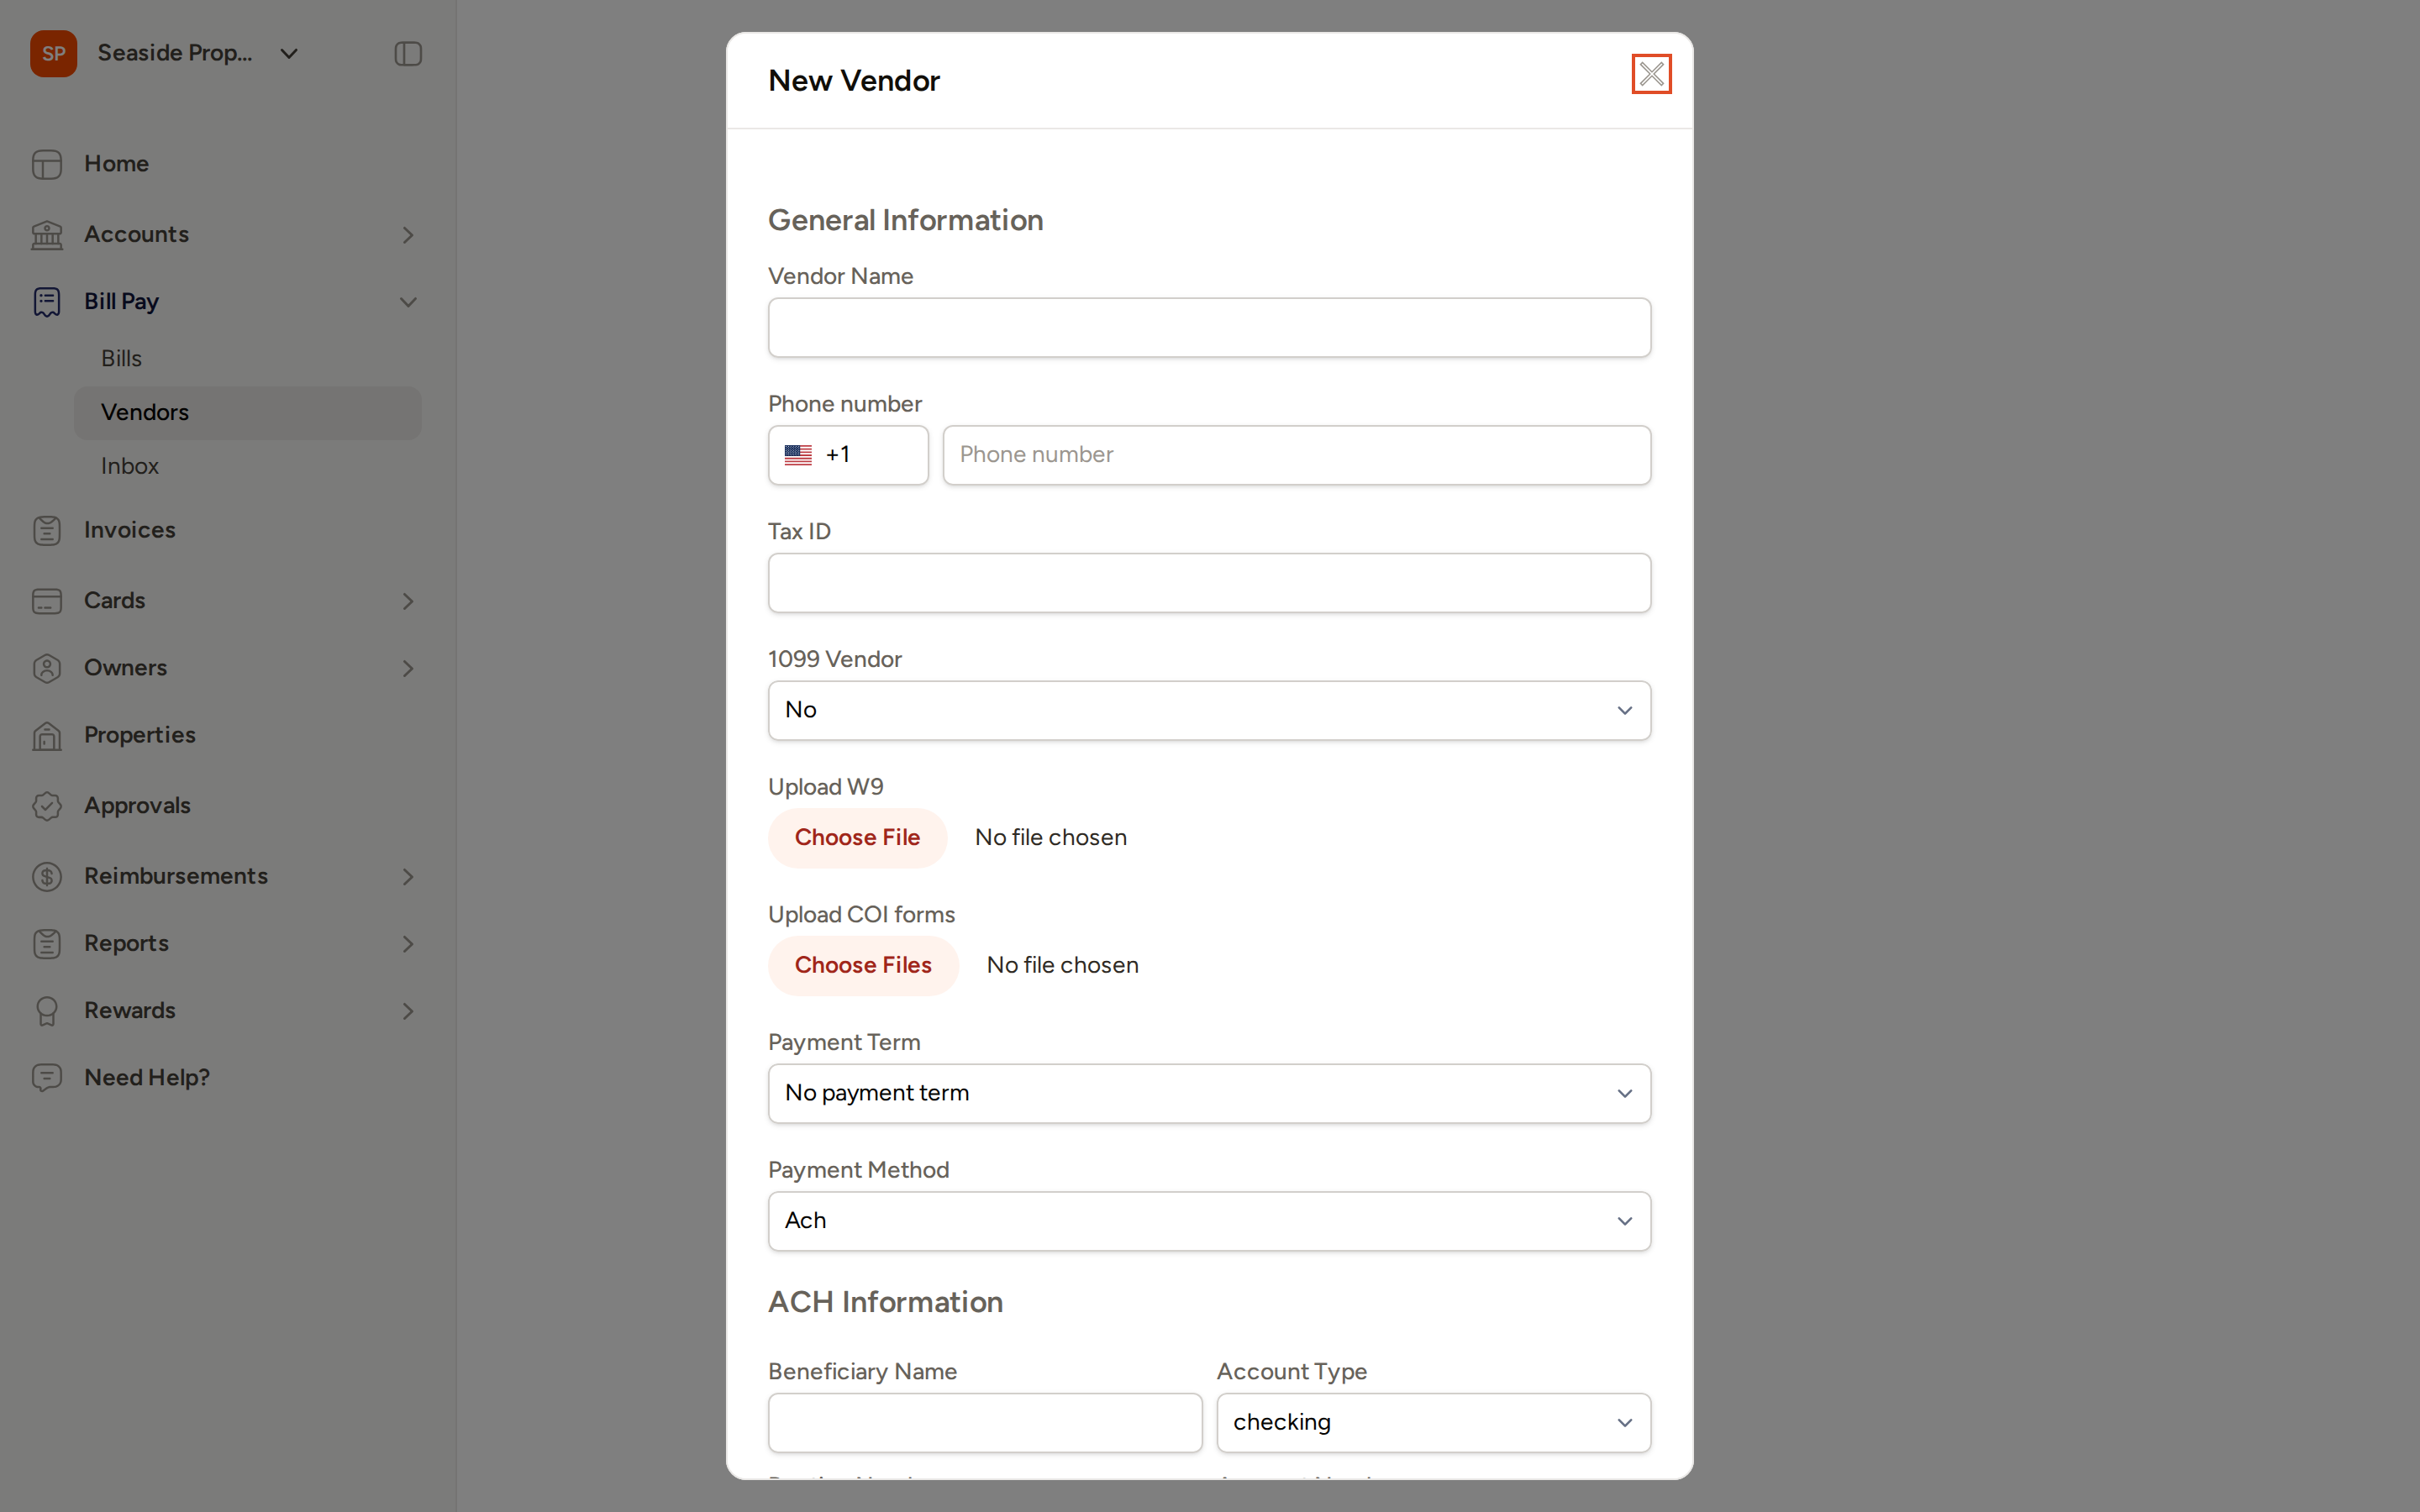
- Vendor Name — Enter a clear, descriptive name that identifies this payee.
- Phone number — Enter the vendor's phone number including country code.
- Tax ID — Enter the vendor's federal tax identification number (EIN or SSN).
- 1099 Vendor — Set to Yes if this vendor should be tracked for 1099 reporting purposes.
- Upload W9 — Attach the vendor's completed W-9 form for your records.
- Upload COI forms — Attach any certificates of insurance on file for this vendor.
- Payment Term — Select the default net terms for this vendor's bills (for example, Net 15, Net 30, or Net 60). You can override this on individual bills.
- Payment Method — Select ACH, Check, or Manual as the vendor's preferred payment method.
- If you select ACH as the payment method, complete the ACH Information section with the vendor's banking details (beneficiary name, account type, routing number, and account number).
- Click Save to create the vendor record.
Managing Vendor Contacts
Each vendor can have one or more contacts — the people at that company you communicate with about bills and payments. Open a vendor record and click the Contacts tab to manage them.

Adding a Contact
- From the vendor's Contacts tab, click Add Contact.
- Enter the contact's first name, last name, email address, and phone number.
- Click Save.
Setting a Preferred Contact
Click the star icon next to a contact's name to mark them as the preferred contact. The preferred contact is highlighted and used as the default recipient for communications from Topkey. Click the star again to remove the preferred status.
Sending a Secure ACH Link
Rather than entering a vendor's banking details yourself, you can ask the vendor to submit their own information securely. From the Contacts tab:
- Locate the contact you want to reach.
- Click Send Secure ACH Link next to that contact.
- Choose Send via Email or Send via SMS (SMS is only available if a phone number is on file for that contact).
- Confirm the action when prompted.
The contact receives a secure link where they can enter their banking details directly. This keeps sensitive account information out of email threads and reduces the risk of errors.
Vendor Payment Settings
Payment settings control how and when a vendor is paid. You can set these when creating a vendor or update them at any time by opening the vendor record and clicking Edit.
- Payment Method — Choose ACH, Check, or Manual to define how payments to this vendor are sent.
- Payment Term — Set the default number of days before payment is due (Net 15, Net 30, Net 60, etc.). Topkey uses this to calculate due dates automatically when bills are created.
- Combine payments — When enabled, multiple bills for this vendor can be paid in a single transaction rather than as separate payments. You can see and toggle this setting directly in the vendor list.
Assigning Processors to a Vendor
Processors are internal team members responsible for managing a vendor's bills. Assigning processors helps your team know who owns the relationship and keeps bill workflows organized.
To view or manage processors, open the vendor record and click the Processors tab. Add team members from your account to assign them as processors for that vendor.
Importing Vendors via CSV
If you have a large number of vendors to add at once, you can import them using a CSV file.
- From the Vendors page, click Actions and select Import CSV.
- On the import page, download the pre-formatted CSV template to ensure your data is structured correctly.
- Fill in the template with your vendor data and save the file.
- Upload the completed CSV file and follow the on-screen prompts to complete the import.
Exporting Your Vendor List
To export your vendor data to a spreadsheet:
- From the Vendors page, click Actions.
- Select Export CSV.
Topkey will generate a CSV file of your current vendor list, reflecting any active filters or search terms you have applied.
Bulk Actions
You can take action on multiple vendors at once by selecting the checkbox next to each vendor in the list. Once one or more vendors are selected, the bulk actions toolbar appears at the top of the list. Available bulk actions include:
- Collect ACH Info — Send banking information requests to all selected vendors simultaneously via email or SMS. This is useful when onboarding a large number of new vendors at once.
- Merge Vendors — Combine selected duplicate vendor records into a single record (see Merging Vendors below).
- Delete — Permanently remove the selected vendor records. You will be asked to confirm before any records are deleted.
- More — Access additional bulk operations for the selected vendors.
Merging Vendors
If you have duplicate vendor records — for example, a vendor was entered twice under slightly different names — you can merge them into a single record to consolidate their bills and banking details.
- From the Vendors page, click Actions and select Merge vendors, or select the duplicate vendors using their checkboxes and choose Merge Vendors from the bulk actions toolbar.
- Follow the on-screen steps to select which record to keep as the primary vendor.
- Confirm the merge.
Restoring an Archived Vendor
Vendors that have been archived are hidden from the Active tab but can be found under the Archived tab on the Vendors page. To restore an archived vendor:
- Click the Archived tab on the Vendors page.
- Locate the vendor you want to restore.
- Click the restore action for that vendor.
The vendor will return to active status and appear in the Active tab.
Frequently Asked Questions
What is the difference between ACH Banking information and Wire Banking information on a vendor record? ACH Banking information is used for standard electronic bank transfers (ACH payments), which are the most common payment method in Topkey. Wire Banking information is used for wire transfers and requires separate routing and account details. Both can be stored on a vendor record and used independently depending on how you pay that vendor.
Can a vendor submit their own banking details without me entering them manually? Yes. Use the Send Secure ACH Link button on the vendor's Contacts tab to send that vendor's contact a secure link via email or SMS. The vendor fills in their own banking details through the secure link, so you never need to handle that information directly.
What happens to a vendor's bills if I archive them? Archiving a vendor hides them from the active vendor list but does not delete their bill history. All past bills remain accessible. If you need to pay that vendor again in the future, you can restore them from the Archived tab.