Invoices
Creating and Editing Invoices
Topkey's invoice form lets you build and send professional invoices to your property owners in just a few steps. Use this guide to create a new invoice from scratch, add line items, configure payment options, and either save a draft or send it immediately.
Start a New Invoice
- Navigate to Invoices in the left sidebar.
- Click New Invoice in the top-right corner of the invoices list.
- The new invoice form opens in Draft status, ready for you to fill in.
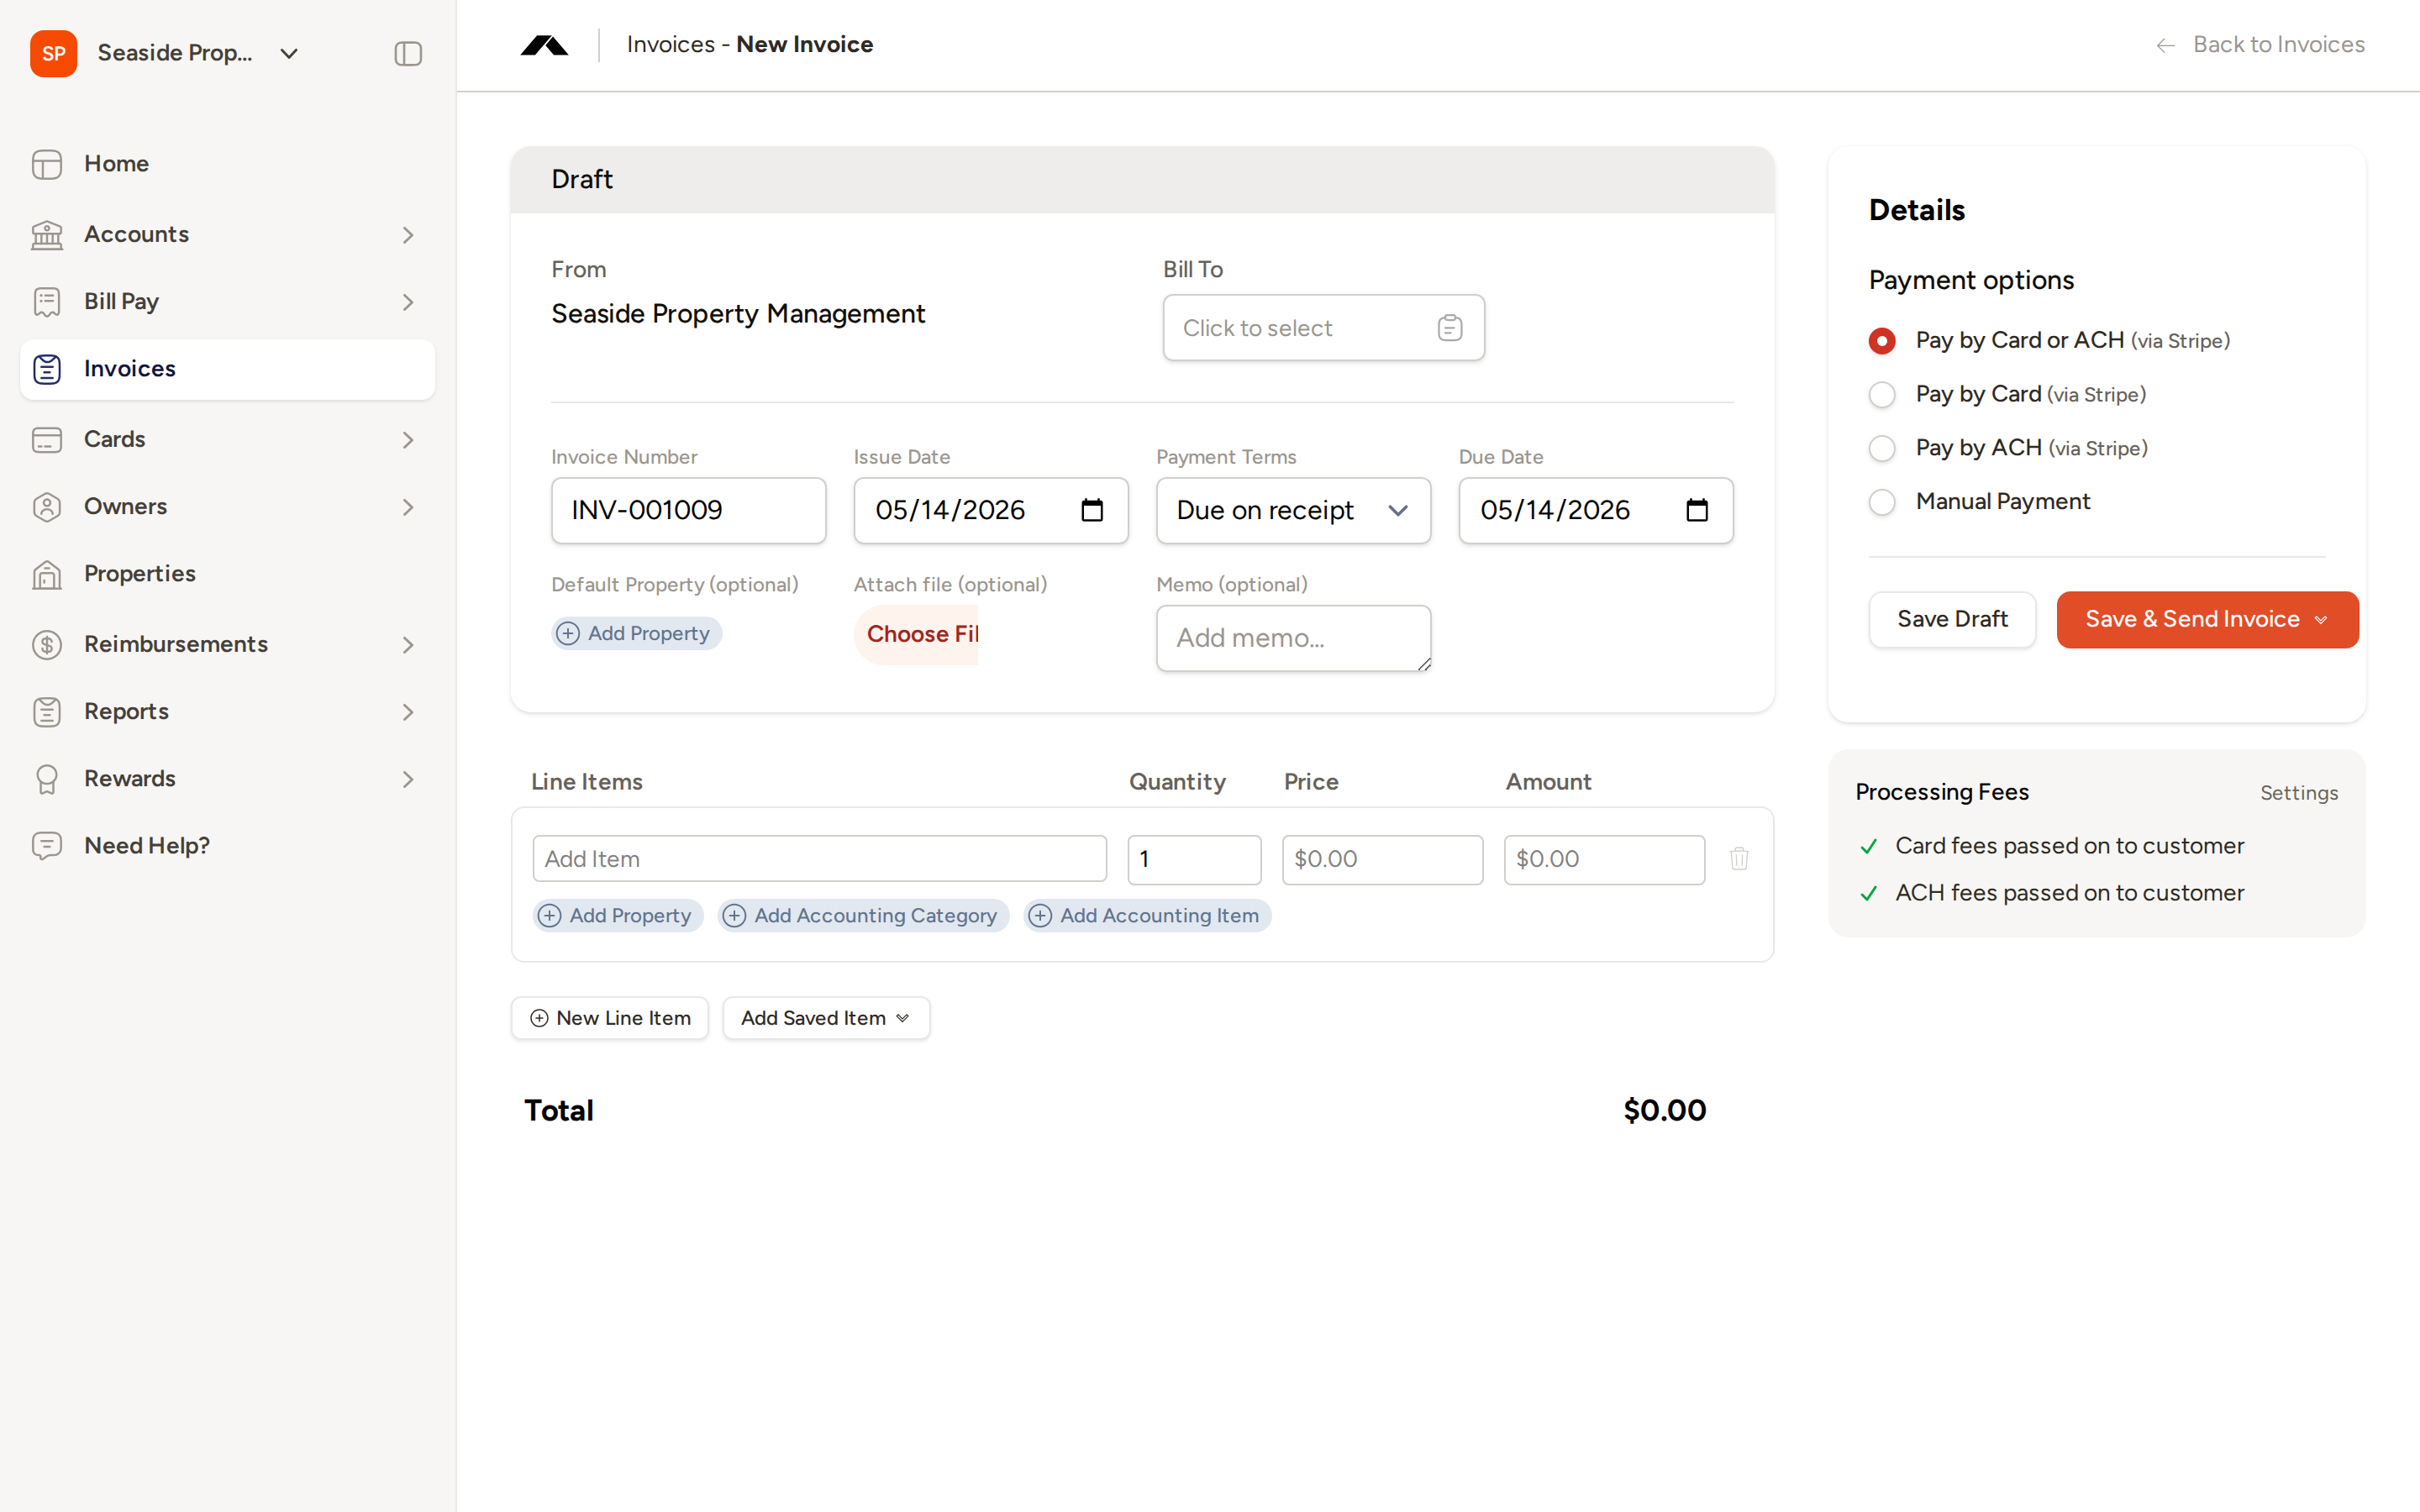
Fill In Invoice Details
Bill To
Click Click to select under Bill To to search for and select the owner you are billing. Begin typing a name to find the right owner, then click their name to confirm the selection.
The From section is populated automatically with your company name and address as configured in your invoicing settings.
Invoice Number
Topkey generates an invoice number automatically (for example, INV-001009). You can edit this number directly if you need to use a different value. The prefix and starting number can be configured in Settings → Invoicing → General Settings.
Issue Date and Due Date
- Issue Date — The date the invoice is issued. Defaults to today.
- Due Date — Calculated automatically based on the payment terms you select. You can also set it manually.
Payment Terms
Use the Payment Terms selector to choose when payment is due:
- Due on Receipt — Payment is due immediately.
- Net 15 — Payment is due 15 days after the issue date.
- Net 30 — Payment is due 30 days after the issue date.
- Net 60 — Payment is due 60 days after the issue date.
- Custom — Set a specific due date manually.
When you change the payment terms, the Due Date field updates automatically.
Default Property (Optional)
Click Add Property to assign a default property to the invoice. This property will be pre-selected for any new line items you add, saving time when all charges relate to the same property.
Memo (Optional)
Use the Memo field to add internal notes about the invoice. This text is visible on the invoice but is intended for your reference or to provide context to the owner.
Attach File (Optional)
Click Choose File to attach a supporting document to the invoice, such as a service report or receipt. Supported formats include PDF, Word documents, and images. The maximum file size is 5 MB.
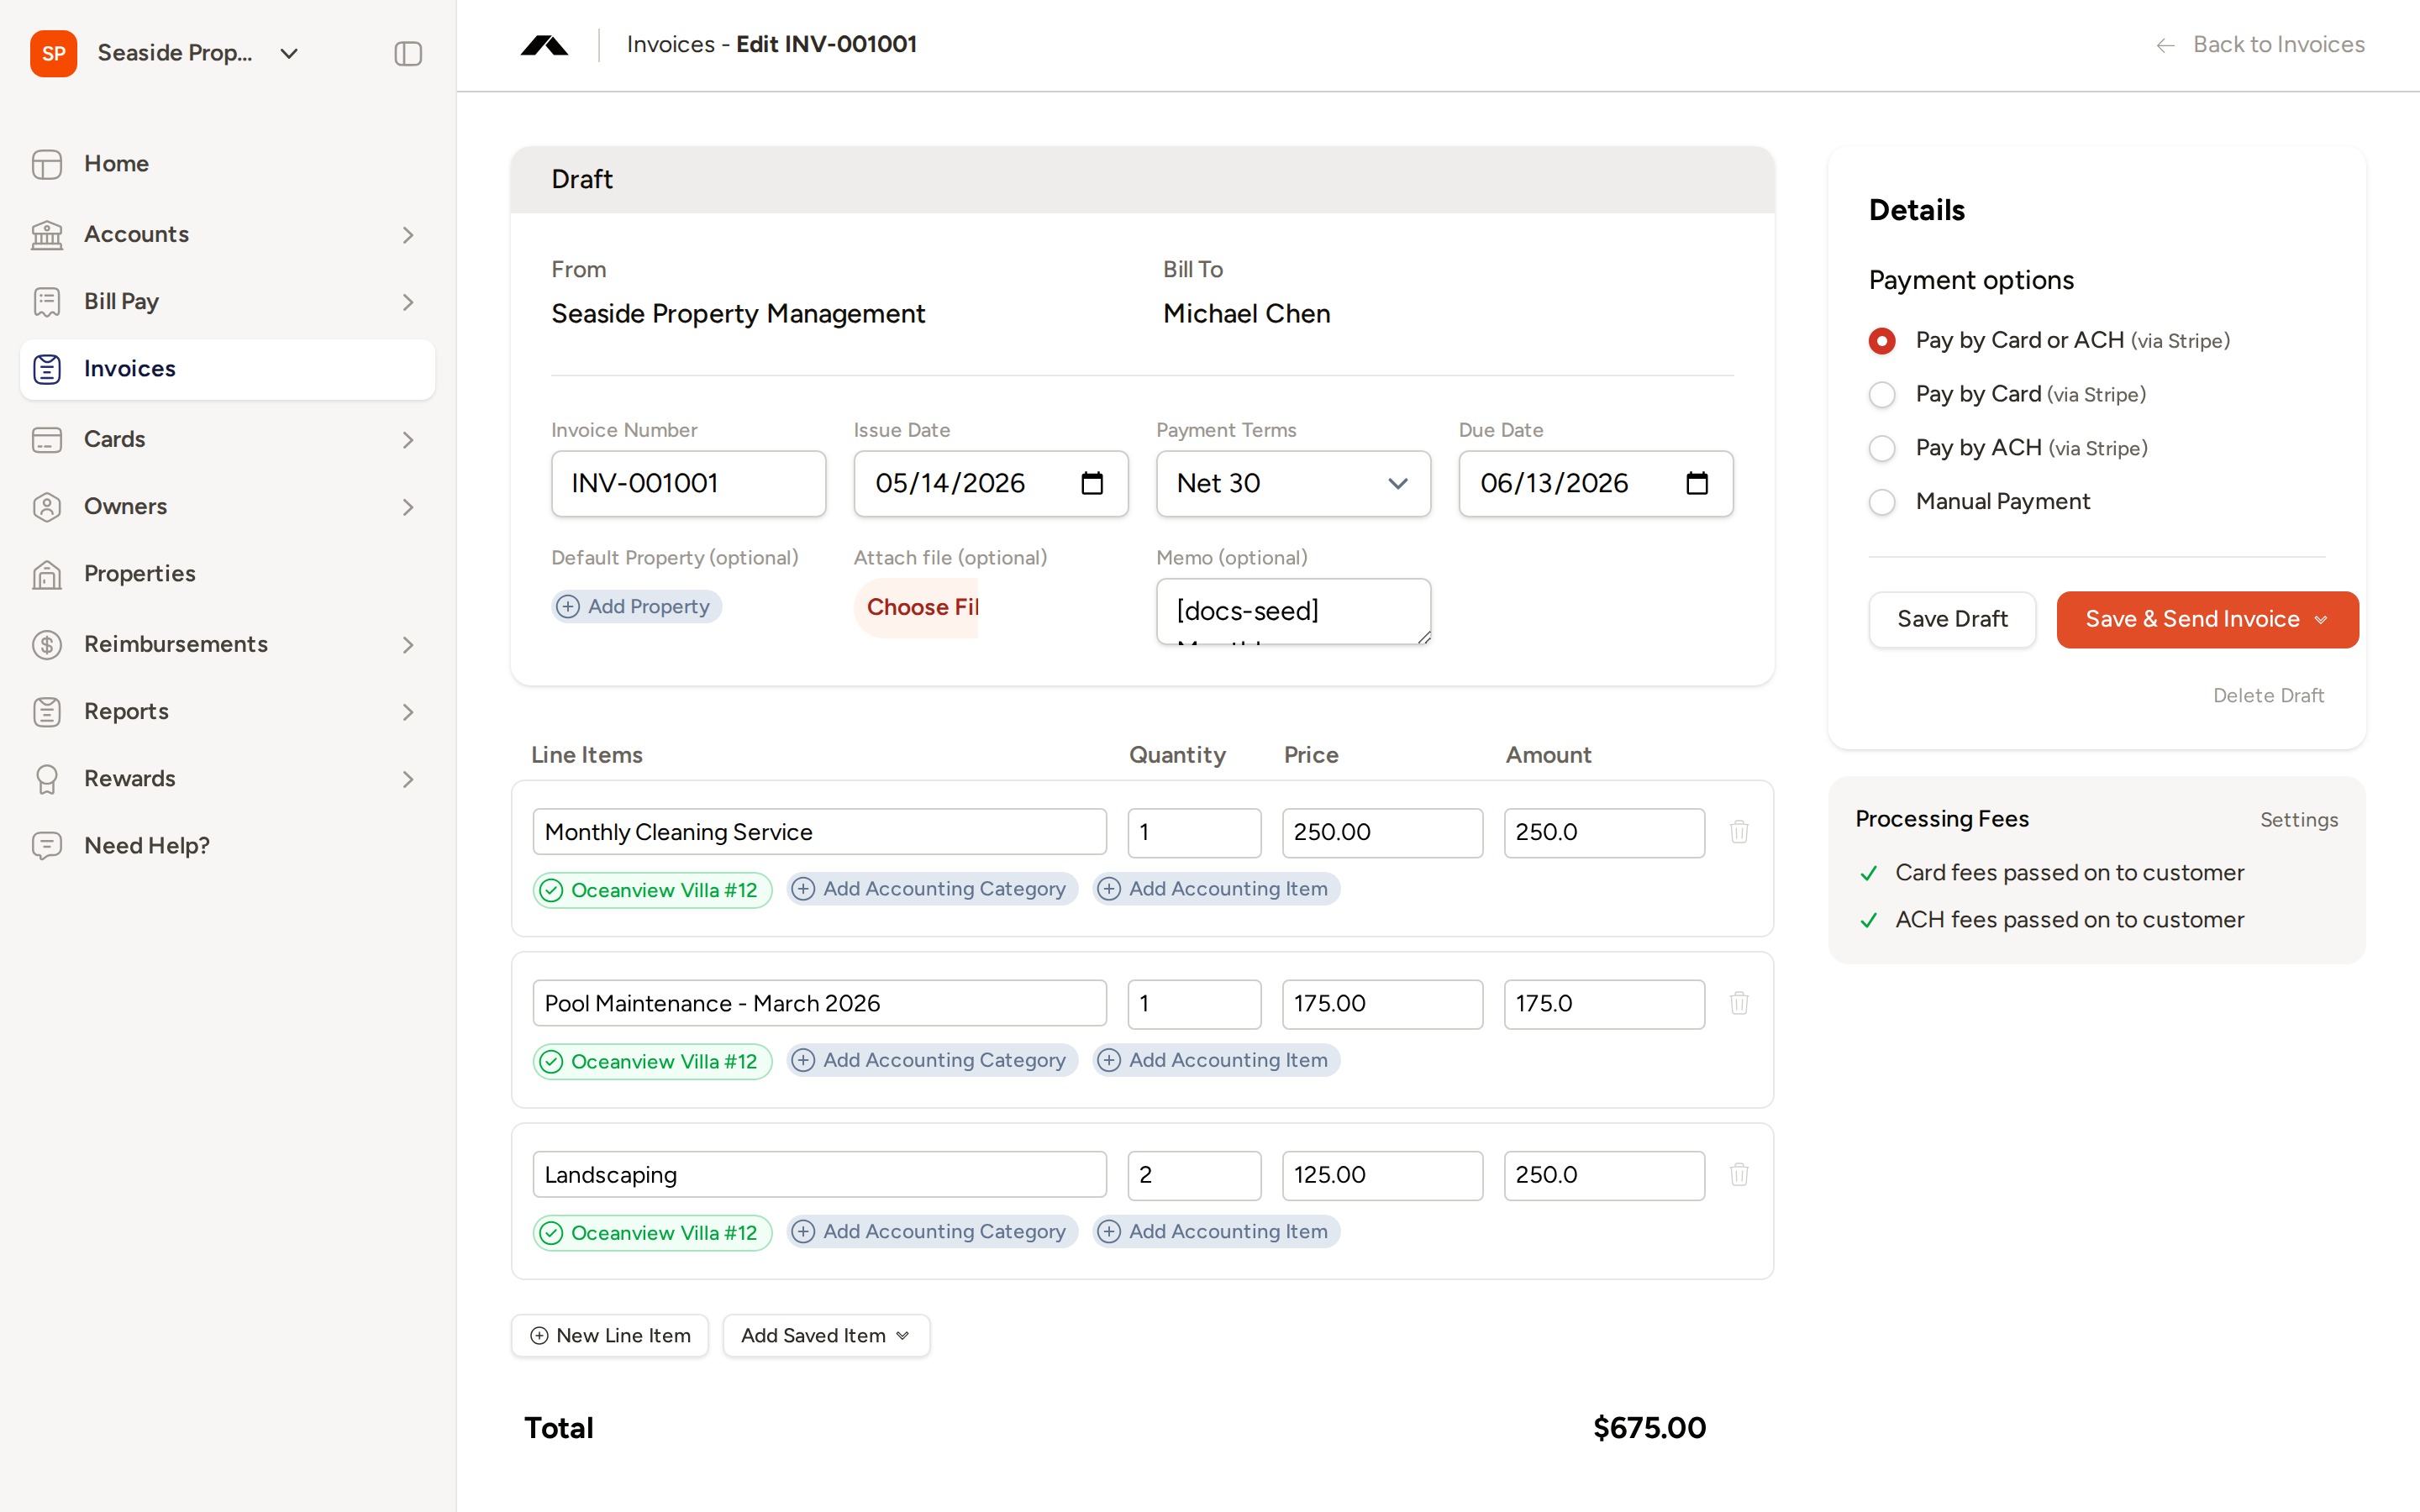
Add Line Items
The Line Items section is where you itemize the charges on the invoice. Each line item has three fields:
- Line Items — A description of the service or charge.
- Quantity — The number of units.
- Price — The price per unit.
The Amount for each line is calculated automatically (quantity × price), and the invoice Total at the bottom updates as you add or edit line items.
Add a New Line Item
Click New Line Item below the line items table to add a blank row. Fill in the description, quantity, and price.
Assign a Property to a Line Item
Below each line item description, click Add Property to assign that charge to a specific property. This is useful when a single invoice covers services across multiple properties.
Use a Saved Line Item Preset
Click Add Saved Item to select from your saved line item presets. Presets allow you to quickly insert commonly used line items — such as "Monthly Cleaning Service" or "Pool Maintenance" — without retyping them each time.
To manage your presets, go to Settings → Invoicing → Line Item Presets. From there you can create new presets, edit existing ones, and delete presets you no longer need. Well-organized presets can significantly speed up invoice creation.
Remove a Line Item
Click the trash icon on the right side of any line item row to remove it from the invoice.
Set Payment Options
In the Details panel on the right side of the form, select how you want to accept payment for this invoice:
- Pay by Card or ACH (via Stripe) — Owners can pay using a credit or debit card, or by ACH bank transfer. This is the default option.
- Pay by Card (via Stripe) — Owners can pay by card only.
- Pay by ACH (via Stripe) — Owners can pay by ACH bank transfer only.
- Manual Payment — No online payment link is provided. Use this when you collect payment outside of Topkey (for example, by check or direct bank transfer).
Stripe-based payment options are only available if you have connected a Stripe account in Settings → Connections. If you have multiple Stripe accounts connected, an additional selector will appear so you can choose which account to use for this invoice.
Save or Send the Invoice
Once you have filled in the invoice details and line items, use the buttons in the Details panel to save or send the invoice.
Save as Draft
Click Save Draft to save your work without sending the invoice to the owner. Draft invoices can be edited at any time before sending.
Save and Send
Click Save & Send Invoice to finalize and deliver the invoice. A menu appears with two options:
- Send by email (using Topkey) — Topkey sends the invoice to the owner's email address automatically.
- Send manually — Topkey marks the invoice as open and provides a shareable link that you can send to the owner yourself.
Once an invoice has been sent, it can no longer be edited directly. If you need to make changes, you must first revert it to draft status.
Edit a Draft Invoice
Draft invoices remain fully editable. To return to a draft:
- Go to Invoices and find the invoice in the Draft tab.
- Click the invoice to open it. Draft invoices open directly in edit mode.
- Make any changes to the invoice details, line items, or payment options.
- Click Save Draft to save your changes, or Save & Send Invoice when ready to send.
To delete a draft you no longer need, click Delete Draft at the bottom of the Details panel.
Frequently Asked Questions
Can I change the invoice number that Topkey generates automatically? Yes. The invoice number field is editable — click into it and type the number you want to use. To change the prefix or starting number for all future invoices, go to Settings → Invoicing → General Settings.
What happens if I forget to assign a property to a line item? Property assignment on line items is optional. You can leave it blank if the charge is not tied to a specific property, or assign one later by editing the draft. If you set a default property on the invoice, it will be suggested automatically when you add new line items.
Can I accept both card and ACH payments on the same invoice? Yes. Select Pay by Card or ACH (via Stripe) to give your owner the choice of either payment method. If you want to restrict to one method only, choose Pay by Card (via Stripe) or Pay by ACH (via Stripe) instead.
Questions? Contact Support